A Step-By-Step Startup Guide For Bootstrappers

After reading various books, essays, and blog posts on what it takes to build a startup I’ve decided to create a step-by-step guide for it that is all-encompassing. Note that this content is heavily influenced by Lean Startup thinking and Running Lean by Ash Maurya, which in my opinion are the best books on succeeding with startup projects as a bootstrapper. A bootstrapper is someone who builds quickly themselves or with a small team and takes as little capital as they can in the early stages. I realize that there is some bias here as there are many other philosophies to building a startup in regards to investors, hard-tech, research projects, or geographical location. I believe that US-based tech founders who don’t mind being technical, and funding their startup without taking too much initial capital will deeply resonate with this guide. For everyone else, I’m sure there is something for you here as well, though one or two of the steps may not apply to you or be relevant.

Below is the list of steps that you can take to incrementally build a successful product. If you follow the guide closely and don’t skip any steps, you should have a high chance of success. Good luck!

1. Come up with a problem to solve

Do this by investing in your passions and living in the future. And no I don’t mean build a space laser and pretend like you’re a space-faring creature from StarTrek. Instead, push yourself to the boundary of your passion by using the best and newest tools, and know both the hackneyed and edgy facts about the topic.

Why focus on problems and not solutions? Most creators make the mistake of focusing first on the solution and fall into the trap of building something that nobody wants because it doesn’t solve their problems. Problem first, solution second.

Become an expert, and push the boundary. For instance, if you want to build a health app for your watch, buy all the health watches you can and try all the features to become a super user. Many problems will then reveal themselves to you, and very likely you will run into those problems yourself which is a great bonus!

Here are some great additional posts if you want to learn more about this topic:

2. Do some market research to understand if and how this problem is being solved today

Okay, so you have an idea. What if the problem you are trying to solve is too difficult to solve with today’s technology. Or perhaps, what if there are dozens of popular solutions to your idea and it will be difficult to break in and serve a feasible audience? Or even more grim, while the problem is feasible and there is no competition, maybe the number of people who find this problem to be a big enough problem for them is small. These are all valid questions and one must do some market research to figure out the answers to these questions.

How can you do this?

First, start with your favorite search engine and do some searching to see if other products solve the problem you’re trying to solve, or even better, people and communities who care about the problem. Then, do some searching on ProductHunt for similar products that solve this problem, and try to read the reviews of these products wherever you can (e.g. Google Play for Android apps, Apple’s App Store, and review boards like ProductHunt). Try to understand what the customers care about, and what they say about this problem. This should give you extra insights on how to proceed.

Next, use your favorite market research tools like Google Trends, Thomasnet.com, statista, or Ubersuggest. Use these tools to understand how popular the domain and problem you are approaching is, how big is the community of people you can serve, how big is the demand for the solution, and who are some of your competitors that have captured a lot of the market already, if any. You can also use paid tools like Crunchbase or SEMrush but I would say paying for these services is a bit overkill at this point. Right now, you should really understand the market, and once you are getting close to product-market fit (at a later stage) you can start paying for these services. If you remember nothing from this post, remember that a startup has very limited resources, and in order to optimize for efficiency, one must take the right action at the right time!

This part of our process is really just a gut-check. Only stop working on your idea and move on to something else if the market is too oversaturated (too many competitors), it seems like nobody cares about the problem, or the problem is too difficult to build with the current state of technology. Most of the time your idea will be okay and you can move on; however, if you are seeing negative signals like these, they will tell you that the journey might be difficult, so maybe you can pick another problem worth solving that will not have so much going against you and you can work with the wind instead of against the wind. This is however; at the end of the day your choice to make! If you are incredibly passionate about something, nothing can stop you, but you have to be ready to put in the work.

Here are some great posts if you want to learn more about this topic:

3. Create and fill-out a few Lean Canvases from Leanstack (or any place you choose from – just google it) to brainstorm a few business models

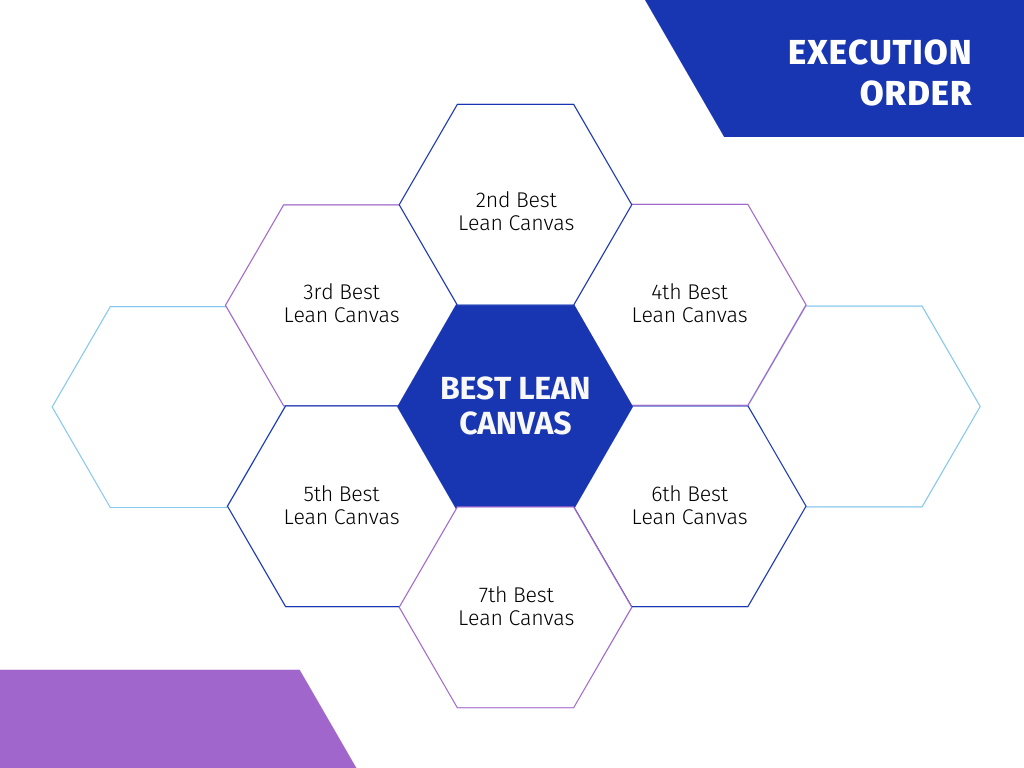
The Lean Canvas is a quick business plan that only takes up one page which has been created by Ash Maurya. He very deftly explains the Lean Canvas and methodology behind it in his Running Lean book which I also highly recommend. Find a Lean Canvas from the Leanstack site or any site that you prefer. You can either fill the canvas out on your computer or print it out and write on it manually. I prefer the offline manual process as it allows me to sit with myself and think without being distracted by any screens. Below you will see the Lean Canvas along with the recommended order you should ideally fill it out in.

Lean Canvas Order of Execution Starting at 1 and Finishing at 9

Make at least one Lean Canvas to start, and try to make a few of them if you can as the process will help push you to brainstorm different ideas, variations, and canvases for your project. Finally, take your time with this process and be prepared to iterate and change this canvas in the future. This canvas is your business plan so be prepared to change it many times until you find the right mold to fit your project and business which actually works!
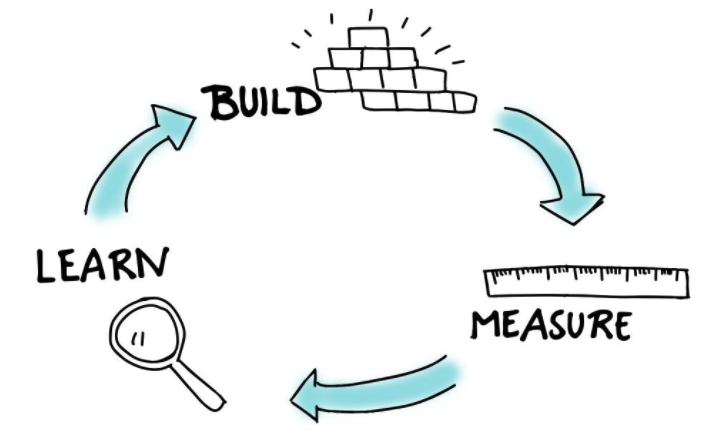
Loop

From this point on we are going to keep looping and pivoting around these following steps until we get to Product-Market fit. Don’t feel discouraged if you have to execute and re-execute the steps of this plan many times, this is part of the process! In startups and entrepreneurship, failing is your best friend. Failing is learning so that next time you can nail the process!

4. Create more Lean Canvas business plans if needed

5. Pick the best Lean Canvas to go with which can maximize learning and success

Identify the riskiest parts of your lean canvas, starting with risks in the recommended execution order (e.g. Problem, Solution, Customers, etc.) and execute the following steps with the notion in mind of maximizing learning. Create specific hypotheses around these risks such as (100 people will subscribe to my newsletter in one month if I publish it using the save-to-Pocket feature). Or if you are building a product specifically for parents, a hypothesis could be (10 parents will identify not having enough time to read articles about fitness because they don’t have time to search for new articles). As you validate these hypotheses around your biggest risks, and the customer segments and markets reveal themselves to you, keep reframing and re-iterating your Lean Canvas business plan.

6. Identify a few potential early adopters and talk to them

Don’t skimp on this step as it is one of the most important in the process. One of the biggest reasons startups fail is because they don’t understand their customers, so take time to get to know them and what their pain points are. You’re in this for the long term!

Find some people who fit the criteria of an early adopter and you can find them in one of your channels in your Lean Canvas. First, it helps to start with close friends or family as you get comfortable with the process. Meet with them for about 20 to 30 minutes and remember that meeting in person is better than meeting via video chat which is better than meeting via phone call which is better than asking the questions via e-mail/text. This is because you will get more signal in higher fidelity face-to-face meetings and will know more about the customer from either the novel points they bring up on their own, or their nonverbal communication cues. Keep the conversation casual, ask some variation of the following questions, and take lots of notes!

  1. What is the hardest part about doing X? (where X is the thing that you’re trying to solve)
  2. Tell me about the last time that you encountered this problem.
  3. Why was this hard?
  4. What, if anything, have you done to try to solve this problem?
  5. What don’t you love about the solutions that you’ve already tried?
  6. Ask any other questions that you may have in order to validate your main risks and hypotheses identified from above.

Conduct a handful of these interviews, stopping when you feel like you are not learning much of anything new from anybody you talk to. For some people, this is 4 interviews, for some 10 or even 30!

Here are some more resources to help you with this:

7. Create a very low fidelity solution to solve the problem – ideally in days/weeks instead of months/years

Based on your idea and feedback you received from talking to users, start creating your MVP! The MVP should not be perfect, but essential and functional. Identify the users’ major pain point(s) where the ideal number of features you should build is one. Don’t bloat the product with extra features or bells and whistles. When it comes to actually creating the product, constantly ask yourself what you can do to just solve the user’s problem in the simplest way possible without having to build too much. Some even go to extremes of building concierge MVPs where they fake the solution behind the scenes and they manually make things work. An example of this is manually looking for potential matches for someone based on their dating preference profile then sending them an e-mail with any finds. Regardless of how the MVP is done, whether manual or prototypal the whole point of the MVP is not to create a product that customers and investors would fall in love with (that’s a bonus). Instead, the most important part of the MVP is to get something out there so that you can get more feedback for users to see if your solution solves their problem, and if you should continue on this path, tweak the solution, or pivot to another solution.

Finally, try to push yourself to finish the MVP in a few days or a few weeks. This way you will eliminate a lot of unnecessary features, and beckon your brain to be resourceful and come up with novel shortcuts to quickly get to solutions in helping your users. Think bold here, and think quick – but still functional.

Here are some more resources to help you with this:

8. Monetize your project right away if applicable

Whether or not you can get rewarded for your creation and people are willing to pay is one of the most important factors that can make or break your project and business. It is not sustainable to create and upkeep a project for free. And you will see that if you have not properly monetized it and it is constantly growing, it will become more and more difficult to upkeep as time and money are scorched from you while you keep the project going. This will increase the chances that you and the project will fail. Therefore, it is incredibly important to come up with and test pricing models early on so that you can learn who is willing to pay for the product, and under what strategy (e.g. sponsorships, subscription model, freemium, ads, etc.).

Here are some ideas that you can try:

  • Talk to users and ask them for payment up-front to use the MVP. If they agree and want to pay, this is a really strong signal that you are building something valuable that they are willing to pay for. If this works, build towards a subscription model.
  • Start a crowdfunding campaign around your project.
  • Develop a freemium model where you have base features that are useful and draw the user in. Do this with the goal of getting the user to pay for the extra features because they are must-haves.
  • Sponsorships or Patronage where organizations or individuals can support you for your work with various strings attached.
  • Advertising.
  • Fundraise from angel investors, and VCs (the best time to go to them is after getting to Product Market fit, and if you are okay giving away some control of the business)

Here are some more resources to help you with this:

9. Launch first, then again and again

Launch your low fidelity solution and measure people’s interest in it. After finishing your MVP, launch it as soon as possible. Don’t worry so much about making a bang, instead just try to get a few invested people to help you learn what they think of it and how it can be improved. Here are some ideas for where you can launch:

After you launch on any of these platforms it is also very important to stay engaged with the audience. If they are commenting on your post, engage with them and continue the conversation to create buzz.

Remember, that the most important thing here is not to acquire thousands of users, but to acquire a few early adopters that can help you get to product-market fit.

For more information on this topic check out the following resource:

10. Talk to users about your solution using Solution Interviews

Gather supportive users who are ideally your target demographic of early adopters and talk to them for about 30 minutes. The purpose of these interviews is for you to test your creation and really understand what your users think of it, thus learning how to improve it.

Here’s the general sequence of how this interview should go:

  1. Quickly introduce yourself and the purpose of the interview.
  2. Collect demographics about the user that can better enable you to pinpoint your early adopters and the customer profile they resemble (e.g. age demographic, gender, and other behavioral factors related to your solution).
  3. Tell them about the inception story behind your product.
  4. Show and explain how your product solves the few major problems they have ideally with a demo.
  5. Ask the users the following questions and note their feedback:
    a) Which part of this demo or product did they resonate with the most?
    b) What feature of the product could they live without?
    c) Are there any features that the user thinks are missing from the current product?
  6. Test out pricing with the user by anchoring on a starting price point for the product and gauging their reaction, and response.
  7. Ask the user if they can connect you with someone they know who they think could also benefit from your product so that you can talk to them next.

For more information on this topic check out the following resource:

11. Come up with and measure a few metrics that can enable you to measure success

Now that we launched a product and started the user acquisition/user feedback process it is time to measure our progress. This is a crucial step that will allow us to gauge how good we are doing and how close we are to product-market fit. When it comes to metrics, the #1 metric that matters should measure user retention. What does that mean?

It helps to lay out the user cycle as a funnel in which potential prospects use your product. Perhaps the user follows a pattern like this:

  • User finds out about your product
  • User goes to your landing page
  • User signs up for your product (Acquisition)
  • User logs in and does a few key activities (Activation)
  • User keeps logging in to do various key activities (Retention)

The key activities from above will again require some learning on your part. You need to find out, for your product, which features and usage maps will lead a user to keep using your product? Perhaps they are first signing up and customizing their avatar in the app you built, or perhaps adding a friend in your app will help them stay activated. For a user to keep coming back, maybe they will have to open your app every couple of days, message a friend, and mark one of their goals complete. This journey widely varies from product to product, and it is important to find out what journey or set of repetitive actions will retain a user.

To find the secret to retention, you must first measure every single user you onboard every step of the way down the funnel we described above. The data you capture on them should be transparent as to when they looked at your landing page, when they signed up, and what activities they do every day. Once you hone in on users that keep using the app or product, try to see which activities they keep doing and that might be a good lead to tell you that these are activities and journeys to help with retention. Then, try to measure those metrics and journeys even more granularly if you can and zoom in on those metrics for every user. You can do this manually, using tools like Google Analytics, or even writing code to record user actions in your database.

Another helpful trick is dividing the measurement in user cohorts which we will discuss later.

Here are some more resources to help you with this:

12. Keep spreading the word, talking to users to get feedback, and measuring success

Get in the groove of recording every interaction you have, from acquiring users, talking to them, having them sign up, and the rest of the actions they take. Invest 80% of your time into a strategy that works and another 20% of your time exploring other avenues to acquire users (e.g. do a new launch, try a new user channel, or reach out on LinkedIn if you haven’t). Keep experimenting until you find the right niches, audiences, and channels for your users. Finally, keep talking to users using Solution interviews from above, and the new MVP interview we will discuss below. Focus these interviews on learning more from users, identifying your best target early adopters, and getting people to start paying you in advance for your product. Another important distinction point is that it is important to bring both new users and old users whom you have done Solution interviews with for the MVP interview.

The MVP interview:

Here’s the general sequence of how this interview should go:

  1. Quickly introduce yourself and the purpose of the interview.
  2. Collect demographics about the user that can better enable you to pinpoint your early adopters and the customer profile they resemble (e.g. age demographic, gender, and other behavioral factors related to your solution). If the user has already been through a solution interview, you may skip this.
  3. Show the user the landing page of your product and ask the users the following questions:
    a) Is it clear what the product is about?
    b) What would you do next?
  4. Show the pricing page and ask the users what they think of the pricing model.
  5. Ask the user to sign up for your product as you watch them go through your product and ideally go through the activation flow.
  6. Record all the answers from above, then ask the final closing questions:
    a) What did you think of the process?
    b) Is there anything we could improve on?
    c) Do you know what you can do next with the product?
    d) Can we check in with you in a few weeks after you played around with the product some more?

Record all the information, and keep interviewing users with Solution and MVP interviews until you feel that you are no longer learning anything new.

  • If success metrics keep growing, continue improving the solution based on user feedback. The goal here is to get to product-market fit.

What is product-market fit?

The holy grail of startups. It is the first step of building a viable business and a signal that you have built something which has strong market demand you can capture. A good way to measure that you are on the cusp of getting to product-market fit is that you retain 40% of activated users month over month. As highlighted in the step above, it is incredibly crucial that you come up with a way to measure activated users, and retained users – what that means for you and your product specifically, and be able to measure it for new monthly cohorts. This means that a user who signed up 3 months ago will no longer be part of this formula. You will always have sliding windows of one month of all users which you activated, and retained in January, February, March, … etc. and this will result in activation and retention percentages for these months. Here’s a quick example:

January:

Total users who tried your product this month: 100
Users activated this month: 20
Users retained this month: 5
% of retained activated users: 5/20 or 25%

February:

Total users who tried your product this month: 105
Users activated this month: 30
Users retained this month: 10
% of retained activated users: 10/30 or 33%

As you can see, we are getting close to the 40% mark. If you see 40% retention month over month it means that you are on to something and are ready for the Sean Ellis test. Which tests the percentage of users that would be very disappointed if your product went away.

The test is simply sending a survey to all of your users, and you can find the method here – Sean Ellis Test

If 40% of your surveyed users say that they would be very disappointed if they could no longer use your product, you have reached Product-Market fit!

13. If success metrics stay stagnant for many weeks, adjust your Lean Canvas based on user feedback, and start again from the beginning of the Loop (Step 4). Don’t be afraid to remove or recycle what you have built.

14. Continue this Loop until you get to Product-Market Fit – You got this!

Keep revising your lean canvas and going through the list above from step 4 above over and over again until you see metrics that grow consistently. This may take you one time to do if you are a veteran or you get lucky, and likely will take you a few times to do if you are diligent. If you have gone through this loop many times and are either a) exhausted from going through the loop with nothing to show for it, b) are finding signals that the problem is not worth solving – by all means, move on to something else unless you are infatuated with the idea. Being infatuated is not a bad thing as long as you’re okay with the long road ahead and the excruciatingly hard work it takes to get there. If you need some inspiration on this front you can read about any space programs like the Apollo or SpaceX – the amount of grit, will and persistence they have to succeed is superhuman.

So I hit Product Market Fit, now what!?

  • Celebrate, this is a momentous milestone
  • If you have not monetized your project yet, now is a time to do so
  • Switch your approach to scaling and optimization

Stay tuned for the next post which will discuss scaling!

I plan on turning this into an interactive checklist for people to use as they plan and work on a project.

Leave a note in the comments or e-mail me at mihai.v.avram@gmail.com if you’re interested in something like this!

Happy building <3

The State Of Web Scraping in 2021

Author: Mihai Avram | Date: 10/02/2021

The area of web scraping has really expanded in the last few years, and it helps to know some of the main frameworks, protocols, and etiquette so that you can build the next awesome Web Scraping tool to revolutionize our world! Or maybe just your local neighborhood, or workgroup – that’s fine too.

In this post, we will cover.

  • What is web scraping?
  • What are the main programming frameworks for web scraping?
  • What are some of the main enterprise-level paid web scraping frameworks?
  • A Python web scraping example where we extract some information from a site with Beautiful Soup
  • A JavaScript (Node.js) example where we interact with Google Search using Puppeteer
  • The Do’s and Don’ts of Web Scraping

Let’s begin!

What is web scraping?

With the web now hosting almost 5 billion web pages, it would be impossible to view each one of these pages personally. Even if you somehow knew the address of each page, and assuming that you are only looking at a page for about 3 seconds, it would take you nearly 500 years to view everything. Now imagine another scenario where you need to take different parts of the web, and organize them for a specific purpose. Perhaps a project to view car prices for your favorite electric car on many car dealership websites. To do this manually, again would take a very long time. This is where web scraping comes in, and is defined as such:

Web Scraping
The act of retrieving information from, or interacting with a site hosted on the web using an automated programming script or process. This process is also known as a web crawler or bot.

One can write such an automated script fairly easily, with less than 10 lines of code, and automatically retrieve information from the web, obviating the need to search, organize, or interact with the website manually. For some specific use-cases, like the car dealership example above, this can save a lot of time, and frankly, there are a lot of business models built by this advent of web scrapers. Some examples of working business models that use web scraping are tracker services that can alert you when something you desire is back in stock, review sites that aim to aggregate people’s opinions, travel websites that want to provide trip data in real-time, and even the much-contested media/marketing practice for gathering users’ profiles and preferences. There are even plausible examples of these web crawlers filling out website profiles for some people, submitting posts, and solving captchas – but this is yet another debated gray area where one must be careful to not get in legal trouble.

With just a little bit of coding knowledge, one can do some really interesting things to retrieve, organize, and even interact with various sites online. In theory, one can automate almost anything done manually on the web – with a wide range in difficulty level of course.

What are the main programming frameworks for web scraping?

Language Agnostic Tools

Playwright – One of the best language-agnostic and feature-rich tools for web scraping. Use it if you are scraping or testing complex applications, are building tooling in multiple languages, or need to perform end-to-end testing.

Selenium – An older and popular language-agnostic tool for web scraping that inspired many of the newer frameworks. Use it if you are working on large scraping or testing projects that need scale, are building tooling in multiple languages, and don’t mind spending a more time on configuration.

While Playwright and Selenium each have their own pros and cons, you can judge for yourself what is the best tool for your job via this comparison article.

Python Frameworks

Scrapy – An open-source scraping framework used to extract data from websites in any format which is built with efficiency and flexibility in mind. Use it for complex projects that require scraping multiple sites in various ways.

Beautiful Soup – A Python scraping library that one can use to parse a webpage easily and quickly. Beautiful Soup is a minimal version of Scrapy with only a fraction of the functionality; however, if parsing a web page is all you have to do – Beautiful Soup is the perfect tool for it. Use it for simple projects where all you need to do is scrape the elements of one web page.

MechanicalSoup – An interactive library that builds on top of Beautiful Soup and provides functionality to not only parse a web page, but also interact with it like filling forms, clicking drop-downs, submitting forms, and more. Use it if you need to interact with web pages.

Honorable mention – Pyppeteer (a Python version of Puppeteer)

JavaScript Frameworks

Cheerio – A fast and flexible JavaScript library inspired by jQuery that can parse elements of a webpage. Use it if you want to quickly extract elements of a web page.

Puppeteer – A NodeJS library that can both scrape a webpage, and also interact with any website by filling forms, clicking buttons, and navigating around the web. Use it for a full web automation experience.

Apify SDK – A web scraping platform that can quickly span and scale your web automation needs in a web browser. From retrieving web pages to parsing web pages, and even interacting with web pages, Apify can do it all and has custom code libraries and server infrastructure to quickly assist you. Use it if you need to start an involved scraping and web automation project that requires a lot of computing resources.

Java Frameworks

Jaunt – A complete web scraping framework from Java that can scrape and interact with web pages. Use it if you need to both parse web pages and interact with them.

jsoup – A simple web scraping solution that can parse web pages. Use it if you need to quickly parse web pages.

Ruby Frameworks

Kimurai – A scraping solution for Ruby that provides a one-stop shop to scrape and interact with web pages.

Honorable mention – Mechanize and Nokogiri Gems

PHP Frameworks

Goutte – A PHP framework made for web scraping that can both scrape and interact with web pages.

What are some of the main enterprise-level paid web scraping frameworks?

What if I want to scrape the web and I don’t know or don’t how to code? You ask with concerned vitriol. That’s where more of the paid services come in where you can start to use any types of services as hands-on as No Code to as hands-off as fully automated services. Below is a list of some of the most popular paid scraping services that can help you quickly get started without having to know how to code.

Scraper API

A custom API that easily scrapes any site and takes care of proxy rotation, captcha solving, and anti-bot checks. It works by entering the URL of any site you want to scrape, and Scraper API returns all the information. Besides the benefit of it being hands-free, it is also cost-effective by providing free requests and relatively cheap pricing rates. Use it if you want the simplest and cheapest solution to scrape sites in a rudimental way.

Apify

One of the most established players in the web automation space. Apify allows you to leverage their thousands of plugins that have been created by the Apify community which can solve most of the common scraping problems. From scraping Instagram to interacting with Travel websites – Apify can do it all. They even have custom solutions where their developers can write custom code to solve your need. The solution also works if you have coding chops and want to do everything yourself. You simply write the code and Apify can host and run the code as well as provide you with proxy rotation and security measures to make sure your scraping scripts do not get blocked. Apify is also comparatively cost-effective compared to the other custom scraping options out there. Use it if you want the most comprehensive options for web scraping at an affordable price.

Parsehub

A point-and-click approach to web-scraping. The way it works is by interacting with the Parsehub desktop app; opening a website there, clicking on the data that needs to be scraped, and simply downloading the results. Parsehub also allows for data extraction using regular expressions or webhooks. One can even host scraping pipelines that run on a schedule. Parsehub is a fairly expensive option. Use it if you want to scrape data using little to no coding chops.

Diffbot

This product takes a different approach by giving a user access to a trillion connected facts across the web. The user can extract them on demand with the service which may include Organizational data, Retail data, News, Discussions, Events, and more. The organization also provides Big Data and Machine Learning solutions that can help you make sense of the data collected, establish patterns, and build IP that solves problems with its data. Use it if you want access to a treasure trove of data that is tied to your project or organization – and are able to afford it.

Octoparse

Similar to Parsehub, this product includes a point-and-click solution to web scraping. It also offers all features of web scraping such as IP rotation, Regex tools to clean up data, and scraping pipelines that can run scraping projects at scale. While Octoparse can solve almost any scraping problem, the service is certainly not cheap. Use it if you want to scrape data using little to no coding chops.

ScrapingBee

A more custom solution to the Scraping API, ScrapingBee allows users to have more control over websites they scrape with little to no coding experience. They offer a bit pricier rates; however, they can write custom solutions to anybody willing to outsource the task to professionals. ScrapingBee also provides proxy rotation to bypass bot restriction software. Use it if you want a cost-effective way to simply scrape a website – with the option of having custom support from professional developers.

Also if you are a person that likes to live on the edge seat of innovation, here are some feature-rich up and coming contenders in this space:

  • Browse AI (#5 Product Hunt product of the month – Sept. 2021)
  • ScrapeOwl (#4 Product Hunt product of the day – Oct. 2020)
  • Crawly (#2 Product Hunt product of the week – 2016)

Here are more resources if you wanted to learn more about different web scraping tools and offerings.

Now let’s get our hands dirty with some scraping projects shall we?

A Python web scraping example where we extract some information from a site with Beautiful Soup

Let’s start with a simple Python scraping example. For this, we will use the Web Scraping Sandbox where we can very quickly explain and elucidate the main ideas behind web scraping.

As a prerequisite, make sure to have Python 3 installed as well as Beautiful Soup. Once you have Python 3 simply run the following in a shell terminal to install the needed packages.

$ python -m pip install beautifulsoup4

and

$ python -m pip install requests

Now let us take a look at the code.

# Imports
import requests  # Used to extract the raw HTML of a web page
# Used to read and interact with elements of a web page
from bs4 import BeautifulSoup
from typing import Dict, List  # Optionally used for type hints
# Functions
def extract_web_page_contents(url: str) -> List[Dict[str, str]]:
    """
    Requests HTML from the url, and extracts information from
    it using Beautiful Soup. Namely, we are extracting just
    a list of books on the page - their names and prices.
    Args:
        url (str): The url where we are web scraping.
    Returns:
        book_names_and_prices (List[Dict[str, str]]):
            Names and prices of all books retrieved from the
            web page.
    """
    # Used to store book information
    book_names_and_prices = []
    book_information = {
        'name': None,
        'price': None
    }
    try:
        # Extracting web page contents
        web_page = requests.get(url)
        web_page_contents = BeautifulSoup(web_page.content, 'html.parser')
        # Extracting the names and prices of all books on the page
        for book_content in web_page_contents.find_all(
                'article', class_='product_pod'):
            # Useful to visualize the structure of the HTML of the book content
            print('book content: ', book_content)
            # Extracting the name and price using CSS selectors
            book_title = book_content.select_one('a > img')['alt']
            book_price = book_content.select_one('.price_color').getText()
            # Creating new instance of book information to store the info
            new_book_information = book_information.copy()
            new_book_information['name'] = book_title
            new_book_information['price'] = book_price
            # Aggregating many book names/prices
            book_names_and_prices.append(new_book_information)
        return book_names_and_prices
    except Exception as e:
        print('Something went wrong: ', e)
        return None
# MAIN Code Start
if __name__ == '__main__':
    url = 'http://books.toscrape.com/'
    web_page_contents = extract_web_page_contents(url)
    print('All extracted web page contents: ', web_page_contents)

Code Explained

Starting at the “MAIN Code Start” section we define the URL to be a link to the Web Scraping Sandbox that has a fictitious list of books. The goal of this code is to browse to the first page on that website and extract the first set books on that page. Namely, we want to extract their names and prices.

The “extract_web_page_contents” function achieves this by first retrieving the HTML using the requests library, and then parsing those contents with the library called Beautiful Soup. Everything is easy up until this point. You may wonder, however – now that we got the HTML of the page, which looks something like this (below) – how can we extract the contents for those books?

<!DOCTYPE html> <html lang="en-us" class="no-js"> <head> <title>All products | Books to Scrape - Sandbox</title> <meta http-equiv="content-type" content="text/html; charset=UTF-8"/> <meta name="created" content="24th Jun 2016 09:29"/> <meta name="description" content=""/> <meta name="viewport" content="width=device-width"/> <meta name="robots" content="NOARCHIVE,NOCACHE"/><!--[if lt IE 9]> <script src="//html5shim.googlecode.com/svn/trunk/html5.js"></script><![endif]--> <link rel="shortcut icon" href="static/oscar/favicon.ico"/> <link rel="stylesheet" type="text/css" href="static/oscar/css/styles.css"/> <link rel="stylesheet" href="static/oscar/js/bootstrap-datetimepicker/bootstrap-datetimepicker.css"/> <link rel="stylesheet" type="text/css" href="static/oscar/css/datetimepicker.css"/> </head> <body id="default" class="default"> <header class="header container-fluid"> <div class="page_inner"> <div class="row"> <div class="col-sm-8 h1"><a href="index.html">Books to Scrape</a><small> We love being scraped!</small></div></div></div></header> <div class="container-fluid page"> <div class="page_inner"> <ul class="breadcrumb"> <li> <a href="index.html">Home</a> </li><li class="active">All products</li></ul> <div class="row"> <aside class="sidebar col-sm-4 col-md-3"> <div id="promotions_left"> </div><div class="side_categories"> <ul class="nav nav-list"> <li> <a href="catalogue/category/books_1/index.html"> Books </a>
...
...
... 
</script> </body></html>

There are two fairly straightforward ways to do this. The first, and most popular way is by using your browser’s development tools to select and identify the elements on the page you want to extract information from. The second is using Beautiful Soup to pretty-print and explore the elements within the code. The second use case may be more advanced, so let’s just focus on the first. Here’s an example below using the browser web tools.

In the above example, I browsed to the website via Google Chrome, hit F12 to launch the web tools, then clicked the selector button (see image below) to then guide my mouse and click on the book I wanted to extract. The book called “The Light in the Attic”

On the right side of the image above you will see that the exact HTML content that needs to be extracted automatically became highlighted. The trick is to notice that every single book is under the “article” HTML tag, and has a class of “product_pod”. Hence, I directed Beautiful Soup to retrieve all instances of articles with that given class, and voila – we now have a list of all the book contents. You may now be thinking to celebrate with a glass of sparkling 💦 , ☕ , or 🍺 if you are old enough; however, not so fast. While we have the book contents, we still have them in HTML format, and so, we must use more selectors to extract the exact content we want (name and price).

The price is the easiest of the two because if we explore the HTML of a given article, we will observe that the class for each price element is “price_color” – so we just create a Beautiful Soup selector to get the HTML element with that class, which contains the price within the text.

The book title is a bit more difficult to extract as we don’t quite have a class we can hook into. Class properties (e.g. class=”price_color”) and Ids (e.g. id=2343) are much easier to hook into because they have higher specificity – are typically more unique for our purposes. Whereas, let’s say we want to find all “a” elements on the page, well, there could be dozens if not hundreds of them! It does help to understand the basics of CSS selectors, and that can help you write rules to identify these elements faster. If you’re interested in learning the basics of CSS selectors, check out this guide. For the purposes of this example, however, if we find the element which includes the title by exploring the HTML via dev tools – we will observe that each title is included in the “alt” property of an element called “img” which is the child of another element called “a”. You could do this by hand by exploring the HTML structure in the dev tools. Or, if you want to take a shortcut, you can simply find any title, select it, then right-click on the HTML formatting of the selector, and click on the “Copy selector” directive (see image below for an example).

You can then paste it into your favorite text editor and you will see that it will yield a CSS pattern that is very close to the one you will use in the code. For instance, here is what the selector contents would be in the example case above:

#default > div > div > div > div > section > div:nth-child(2) > ol > li:nth-child(1) > article > h3 > a

This tells us roughly what we suspected, there is an “a” element that has a parent of “article”. Then all we have to do is extract the “alt” property as we do in the code, and we have just extracted the title!

Feel free to review the comments of the code for a deeper dive on how the scraping works with Python and Beautiful Soup. I tried to make the code example as self-explanatory as possible. Now that you feel more comfortable with this basic example – how about you challenge your understanding by looking to extract the book contents for 10 of the pages? Hint: You may need to use the aspect of pagination for this.

A JavaScript (Node.js) example where we interact with Google Search using Puppeteer

Let’s now delve into a more complex scraping example with JavaScript where we will interact with information on a web page using the Puppeteer API. In our simple example, we will simply go to Google, and run a quick google search.

As a prerequisite, you will have to install the latest version of Node.js and npm, and once you have both installed you can install puppeteer by running the following in a terminal:

$ npm install puppeteer

Now let us take a look at the code.

// Imports
const puppeteer = require('puppeteer'); // Used for interacting with a website
// Functions
/**
 * Interacts with a website present at a certain url.
 * For our use-case, this url is Google, and we are
 * simply just searching something using the search bar.
 *
 * @param {string} url The url we are browsing to, and
 *                     interacting with.
 * @returns {void}
 */
const interactWithWebsite = async (url) => {
  // Starting a browser session with puppeteer
  const browser = await puppeteer.launch({ headless: false });
  // Opening a new page
  const page = await browser.newPage();
  // Browsing to the url provided, and waits until page loads
  await page.goto(url, { waitUntil: 'networkidle2' });
  // Filling in the search as "Best guides for web scraping"
  await page.$eval(
    'input[title="Search"]',
    (el) => el.value = 'Best guides for web scraping',
  );
  // Clicking on the Google Search button
  await page.evaluate(() => {
    document.querySelector('input[value="Google Search"]').click();
  });
  // Waiting for the results
  await page.waitForSelector('#result-stats');
  // Waiting for 5 seconds to admire the results
  const waitSeconds = (seconds) => new Promise(
    (resolve) => setTimeout(resolve, seconds * 1000),
  );
  await waitSeconds(5);
  // You can do more stuff here, like retrieve the results like we did
  // in the Python example above
  // We are done, closing the browser
  browser.close();
};
// MAIN code start
const url = 'https://google.com';
interactWithWebsite(url);

Code Explained

The code starts with the “interactWithWebsite” function which will browse to Google. We first launch a browser, open a new page, and go to the URL we searched, waiting for it to load. Then, we find the input field with an attribute of “title” called “Search” – and fill it with our query. Just as in the Python example above, one can use the browser web tools to find the component on the page, and the properties, as well as CSS selectors, needed to retrieve them with code. Below is an example of finding the search field component, and the HTML that it is defined by – from there we can create the CSS selector to hook into it.

Finally, we find the “Google Search” button which is an input field with a “value” attribute of “Google Search”, and click it. On the resulting page, there will be an element with the id of “#results-stats” – and we wait for it to load. Our magical and automatic google search is now complete! Feel free to review the comments of the code for a deeper dive on how the scraping works in Puppeteer and Node.js. I tried to make the code example as self-explanatory as possible.

Now that you have learned to both retrieve information from and interact with web pages, you should be well on your way to create some automation magic! When you do start – it will be important to understand some scraping etiquette which we will discuss next.

The Do’s and Don’ts of Web Scraping

While it may seem like web scraping is a free and easy way to extract information from the web, the web is no longer a wild west. This means we have to be careful how we interact with various sites, otherwise, we risk being a nuisance at the very least, and even possibly fined or punished for breaking the law in the worst case.

The most important theme to remember from this post if you don’t remember anything else is the notion of not doing any harm to a website, its users, and its owners.

Below are some specific Do’s and Don’ts to help you apply the theme above and engage in web scraping in an ethical way:

  • Use only one IP connection
  • Crawl at off-peak traffic times. If a news service has most of its users present between 9 am and 10 pm – then it might be good to crawl around 11 pm or in the wee hours of the morning.
  • Follow the terms of service of a website you are crawling, and especially if you have to sign up or log in to use the services within.
  • Some websites have a robots.txt file that lists the rules and limitations that scrapers should follow when scraping and interacting with the websites automatically.
  • If you are crawling to present the content in a new way, or solve a problem – make sure that the solution is unique and not simply copy/pasting content. The latter can easily be seen as copyright infringement.
  • Don’t breach GDPR or CCPA rules

Here are some articles to delve more into this topic:

Additionally, here’s an article that describes the robots.txt file at length

Conclusion

That’s all for this post. I really hope that you have enough basic knowledge and guides to get you started in creating an ethical and world-changing web scraper!

Nil to NLP

Author: Mihai Avram | Date: 06/02/2021

Most people in tech know that Machine Learning is blowing up and that it can be applied in many different areas. This is a short guide for the specific context of applying Machine Learning to language. With enough curiosity in understanding the concepts and backlinks, it should robustly pass you over in the beginner phase of learning how to apply Machine Learning towards text.

Applying Machine Learning to text is a field which is also known as Natural Language Processing (NLP) or Computational Linguistics. We cover topics such as data gathering, data cleaning, supervised, unsupervised, and deep learning methods, as well as how to evaluate our models and apply them in the real world to solve classification, clustering problems, and more. Let’s dive in.

Input Data

Image Credit

In the the realm of NLP, without data, it is difficult to do exciting things. But what does the notion of data mean in this context? Simple, just text, and text labeled for various purposes. Let us say for example that we are building a classifier that can detect the gender of the subject in a given sentence. Here are two examples of one data point below, meant for this purpose:

Data Input:
“John went to the store to buy some apples, and brought them back home to his family a few hours later.”

Target Label:
“Male”

Data Input:
“Jane was recently promoted to a Senior Administrator position and she was thrilled!”

Target Label:
“Female”

Now for this classification problem we understand what data we need to feed the algorithm – but how much data? Certainly more than two data points, and it greatly depends on our context, problem we are trying to solve, structure of our data, and many other factors. The best way to answer it is to start with as much data as we can get, and try, with trial and error to see how our classifier is doing using the Evaluation methods explained later in this article. A general rule of thumb is that for supervised methods (e.g. Naive Bayes, Logistic Regression, etc.) we will need a lot less data than for Deep Learning methods (e.g. RNNs, Transformers, etc.).

We also have to pay attention to how we label our data, either manually, or finding a vendor that can do it for us. Some problems like in the gender example above, we have one input (a sentence) and one output label (the gender) which is a one-to-one mapping. Some NLP problems are more nuanced and may have an output of (true / false) in binary classification, or multi-label classification with many possible output options (e.g. options a, b, c, d, etc.).

Data Preprocessing

A machine or computer cannot just read text as it is like we can. Therefore, we typically need to preprocess our data. Supervised methods can especially benefit from this with one-hot encodings or word embeddings, which we will cover later. However, any other pre-processing steps you should try with a grain of salt on Deep Learning methods as they may not work. This is because Deep Learning methods understand a myriad of patterns from your data and sometimes non-pre-processed data can contain extra patterns the Deep Learning methods can pick up on, and by eliminating them, we could potentially remove those patterns. Here are some useful preprocessing steps.

Tokenization

We take a piece of text such as “John ate the apple.” and we split each token into an entity so that the rest of the process has the atomic components of the text to work with, such as “John” and “ate” and “the” and “.” at the end. These atomic components can really help in further downstream tasks when we have to normalize, or stem our data for instance.

Normalization

We also want to remove redundant items from our text such as extra spaces, stop words (which are common words like “the” or “to”), and any other irrelevant text components for the task at hand. Let’s say that you are parsing a web page and only need the paragraph from the first header, in such a case you want to remove any
html header tags from your text! Finally, we want to remove or replace unnecessary symbols such as accents (e.g. é should be converted to e and Ó to O).

Stemming and/or Lemmatization

This involves converting all words into their base form. There are many ways that one can convey a theme. For instance, the following two sentences:

“Jane liked skydiving”

“Jane likes skydiving”

These two sentences convey the same theme that Jane is enamored with skydiving, but at the bit-wise level and how the computer understands them, these two sentences are different. Once we lemmatize these two sentences, they will be lemmatized to something like “Jane like skydive” which applies to all versions of conveying this idea – and can really help downstream tasks such as classifiers better pick up on patterns.

What is the difference between stemming and lemmatization? In short, stemming creates a simple mapping between words and their root forms, while lemmatization considers word context in a sentence or phrase and can create root words based on more language and vocabulary factors instead of just a simple mapping. For more information on stemming and lemmatization, check out this resource.

Word Embeddings

The final step of our preprocessing involves turning all the text we have into vectors of numbers. Computers can only understand numbers, so this conversion must be done so that the NLP algorithms can work. An example of what this will look like is turning a sentence such as “Jane like skydive” to a list that resembles a unique number for each word.

["Jane like skydive"] -> [3, 5, 2]

Another way to build word embeddings is through one-hot encoding which is a mapping that presents all words in a corpus. For the purposes of highlighting this point, let’s say we have a corpus with only 3 words (though in the real world we will have corpora that easily span more than 10,000 words). The three words are “Jane”, “like” and “skydive”. We can then represent them as such:

"Jane" -> [1, 0, 0]
"like" -> [0, 1, 0]
"skydive" -> [0, 0, 1]

Where each word will have a 1 in a unique spot, and 0 everywhere else. There are many ways to build such embeddings, and each NLP framework will have its own methods. One popular method is using Word2Vec which maps each word in a high dimensional space so that the notion of how close, or far away, two words are – in meaning – can be showcased with vectors.

Here is a good resource explaining how Word2Vec works.

Other popular word embedding methods include TF-IDF, Glove, Fastext, and ELMO which you can learn more about here.

That’s about it for preprocessing! If you want to learn more about NLP Text Preprocessing and word embedding techniques, check out the following resources.

Supervised Methods for NLP

The most popular and easy to understand NLP methods are supervised learning methods. These consist of providing an NLP classifier preprocessed input data along with output data which is labeled.
Referring back to our Input Data section from above, we will need to provide the input data, and the outcomes of that data so that the algorithm can actually see how to correctly label automatically. Here are some popular and effective supervised learning methods:

Naive Bayes – A simple method based on the Bayes’ Theorem that can help compute conditional probabilities based on occurrences of multiple events.

Bayes’ Theorem

Pros:
– Easiest to implement
– Typically does not overfit (concept covered later)
– Easy to train

Cons:
– If you are working with data which has features that are dependent on each other, then it will perform poorly
– Can introduce bias from the features

For more information about Naive Bayes, see the following article called – A practical explanation of a Naive Bayes classifier

Support Vector Machines (SVMs) – Creates a boundary in some positive dimensional space (e.g. a line dividing two sides of a map) and uses that boundary to see what to label the input data. As an example, if a data point falls to the right of that boundary, perhaps the text is classified as spam. On the other hand, if it falls to the left of the boundary, the text is classified as non-spam.

Below is an example highlighting how an SVM can create decision boundaries to cluster different groups (blue, yellow, and red groups in this case which all make up different classes).

Image Credit

Pros:
– Works very well when one has a lot of features to work with
– Also performs well when there is a clear margin of separation between classes

Cons:
– Does not perform well when the data is noisy
– Not very well suited to large data sets

For more information about SVMs, see this article called – Text Classification Using Support Vector Machines (SVM)

Logistic Regression – A type of regression function that takes the output and passes it through a sigmoid function which transforms any number between 0 and 1 which can then be used to predict between two classes. If you have more classes to predict, Multinomial Logistic Regression will be your friend there.

For more information about Logistic Regression, see this article called – Build Your First Text Classifier in Python with Logistic Regression

Decision Trees – Creates a system of decision rules as inferred from prior data samples. For instance, in the case of detecting spam, the algorithm may go through a series of questions, or decisions. Is the e-mail sent from an address that is from a blacklist? Does the e-mail contain a subject line? etc. Based on these decisions, and having seen many training data points with accurate labels (e.g. spam, non-spam), these decision boundaries are created and can best predict the problem at hand.

Below is an example of a decision tree that can predict types of cars based on their specs.

Image Credit

Pros:
– Easy to understand and explain
– Requires little to no preprocessing

Cons:
– Can be very volatile to data changes
– Takes a while to train the model

For more information about Decision Trees, check out this article – Decision Trees Explained Easily

Ensemble Methods for NLP

So we have all these methods and bags of tricks for solving Machine Learning problems. What if we could combine the results of all of them and create one aggregate result? That is the purpose of Ensemble Methods. They essentially combine the results of many classifiers in our toolkit (e.g. Logistic Regression, Naive Bayes, etc.) and use voting or averaging to come up with a one solution consensus. There are a few ways of doing this.

Voting

We create many learners which can just be the same algorithm trained on different data points, or different algorithms trained on the same data, or anything in between. Once we have all of these algorithms, we can have them vote what they yield as the correct prediction. We then tally up the votes and either pick the majority vote, or use some weighted scheme to find which prediction is true. Perhaps one of the algorithms you built has been vetted to be one the best-in-class for the prediction problem, so you give that algorithm a very high vote weight (e.g. the equivalent of 10 votes). This way the vote aggregation is done fairly based on the strength of the learners you have built. The same concept applies to regression, except for instead of tallying votes, one would average the results.

Stacking

In this case we create a classifier that can take our input data and have resulting predictions. Such predictions are then used for another classifier as input so that the encompassing classifier can make better predictions. One could imagine creating a stacked pipeline of many algorithms that feed their output to each other until a final classifier in the pipeline is able to predict the final labels. Something like the following diagram.

Image Credit

Bagging

Imagine having a dataset of 1,000 points. We can use bootstrap sampling where we can take random points from this dataset (some of them even double-counted) and create whole new subsets of this dataset. Using the many samples of data we created, we can then feed them as input to a classifier or group of classifiers and voting techniques will allow us to aggregate a result from all these methods. A popular and powerful Bagging method is Random Forest which uses Decision Trees as the base classifier.

Here’s a good resource to learn about Decision Trees and Random Forest.

Boosting

A family of classifiers that are able to convert weak machine learning algorithms together so that together they become strong. Any models that can perform a bit better than random guessing can become powerful if they are combined. These classifiers can be combined through a majority vote and one of the most popular and powerful methods for this is called AdaBoost.

Here’s a good resource to learn about AdaBoost.

One big caveat of ensemble methods is that they are not very interpretable. So even though you can write complex code and stack many algorithms to get the highest performance, you may not be able to explain your results so be wary of this when creating the classifiers. If your task at hand requires a lot of explainability and transparency, then ensemble methods may not be for you.

For a great resource describing ensemble methods, check out the following blog post from Toptal called Ensemble Methods: Elegant Techniques to Produce Improved Machine Learning Results

Unsupervised Methods for NLP

Unsupervised methods do not require any labeled data to ascertain patterns and find possible responses to our questions. The most popular unsupervised methods in NLP are clustering methods such as K-Means Clustering, or Latent Dirichlet Allocation (LDA). There is some complexity to these methods so we will briefly explain them and point to links that truly gives them justice.

K-Means Clustering

A method that groups input data together based on commonalities. Say that you have a large amount of text data that can either be labeled as spam or non-spam. Note that in this instance perhaps you don’t have any labels here because you never had time to manually look at each data point by hand and label it. No problem, K-Means will take your data points and find commonalities between them which will cluster the groups together in as many groups as you would like. In this case, let’s say we should only have a spam and non-spam group, so 2 groups in total. We then should only see the results being two grouped clusters cleanly divided into spam and non-spam. Note that there are many other Clustering techniques and K-Means is just one of them.

To learn more, you can check out this K-Means Clustering Resource.

Word2Vec

A very popular unsupervised method in NLP is Word2Vec. It works similar to clustering; however, imagine that each data point or word can stand on its own and has unique features about it. Word2Vec essentially coverts words into vectors – or numerical representations of a word. These representations allow various algorithms to find similarities between such vectors (e.g. the fact that dog and cat are both animals but a pencil is not). Using Word2Vec you can create a model that can tell the difference between words, among other things.

To learn more, you can check out this Word2Vec Resource.

Latent Dirichlet Allocation (LDA)

LDA is a method similar to K-Means clustering but focused on topic modeling text data. In particular it maps words to topics, and topics to documents. Note that a document here has a semantic meaning and it can really be just any text (e.g. a paragraph, a sentence, or a web page). LDA finds distributions of how these words, topics, and documents are related, and based on those distributions it can then create clusters of data from all of your text documents and be able to group them. An example of this is having 100 news articles spread out among 3 categories (sports, politics, and weather). After running LDA on our articles, we should be able to get back clearly divided sections where 20 of the articles were talking about sports, 40 about politics, and another 40 were talking about the weather.

To learn more about LDA you can check out this resource.

Another emerging unsupervised learning method is using Generative Adversarial Networks (GANs) to generate or manipulate text. For more information check out this article called Generative Adversarial Networks for Text Generation — Part 1

Deep Learning Methods for NLP

The most popular and powerful deep learning methods in NLP are Convolutional Neural Networks (CNNs), Recurrent Neural Networks (RNNs), and Attention Mechanisms / Transformers. Let’s briefly cover them next.

Convolutional Neural Networks (CNNs)

A method which takes words or phrases and creates higher level features from them. These features can then be used downstream as word/phrase embeddings. While they can be fairly effective, they are not good as other Deep Learning methods at ascribing meaning based on short or long distance contextual information. Most of the time CNN output is taken downstream to aid other NLP classifiers. Below is a diagram covering the salient components of a CNN – namely convolution and pooling.

Image Credit

For more information on CNNs, check out this guide.

Recurrent Neural Networks (RNNs)

Recurrent Neural Networks essentially models sequential data and is able to comprehend the past and the present of the inputs. This makes them very powerful for text prediction or generation, however they suffer from the vanishing gradient problem where the back-propagation gradients (important artifacts that help the network learn) get closer and closer to 0 with the more layers that the network has. There are variants of RNNs that can prevent this from happening, namely LSTMs, GRUs, and ResNets. They generally work by having input, output, and forget gates that can help bring in relevant data, and drop-out irrelevant data. Another issue of RNNs is the notion that they take a long time to train, and Attention Mechanism architectures such as Transformers aim to solve this problem. Below is a rough diagram describing the general architecture of RNNs.

Image Credit

For more information on RNNs, check out this guide.

Attention Mechanism

An idea that expands upon RNNs and their more complex LSTM/GRU counterparts. The idea is that as the nerual net learns from the data, it pays attention to only relevant features, words, or phrases that are important for the task at hand. Transformers use this notion of attention in the form of data matrices and combines a seq2seq model (which typically has an input, a decoder, and an output). First the data is taken in as input and attention is applied at some point between the input and the output, so that when generating the output it is typically higher quality as the attention model has tuned for what is relevant. For more information on Transformers, and this class of architectures, check out this resource.

Additionally, for a deeper guide on Deep Learning methods for NLP, you can check out this guide (Deep Learning for NLP: An Overview of Recent Trends)

Few Shot Learning

All of the NLP examples we described previously assumed that we have plenty of labeled data to work with. What if, however, we only have a few labeled examples (a handful, or a dozen, or a hundred). If it is easy and inexpensive to label more data, that would be the advised solution. However, if we don’t have such luxuries we have to use Zero/One Shot Learning or Few Shot Learning.

Zero Shot Learning

Zero Shot Learning in the NLP community refers to using an algorithm to classify things it wasn’t trained to classify in the first place. This is a complex topic to explain and this article by Joe Davidson does a great job.

One Shot Learning

One Shot Learning as the name implies is a framework that can create a decent classifier based on one data point. This may not apply as much in NLP as it has traditionally been used in the Computer Vision community. Though there is definitely some good experimental work at the moment that is applying One Shot Learning to NLP.

Few Shot Learning

Few Shot Learning is more relevant to NLP as it allows for using the few labeled samples that we have to create classifiers that can either be good-enough based on some evaluation metric, or fairly poor, but still be relevant enough to label more of our data. Once we have more of our data labeled with those rough labels, we can then create better NLP algorithms, and with enough hyper-parameter tuning and the right regularizers/loss-functions – one should be able to have generally good results at the end of this process.

For more information on how these approaches work, see the following resources:

Text classification from few training examples – Maël Fabien

Evaluating Our Classifiers

Okay so we just built some NLP models to do our bidding, and now how do we know how well they perform? There are a few widely used metrics that come to mind here. It also helps to have an example to frame our thoughts. Let’s say we built a classifier that can detect someone’s mood based on their writing. The options in this simple example are: cheerful, sad, angry, and humorous.

We then train our classifier on our training set, and have another set of data called the test set which the classifier was not trained on but which we labeled ourselves for evaluation purposes. Sometimes the test set can also be referred to as the development set, and the distinction between them is the following. The development set can be used internally while training the model with different configurations, features, hyper-parameters, etc., while the test set is then used at the end for one final check once the training is done. Both the development and test sets are labeled sets of data where we have text sections annotated with the writer’s mood.

We run the classifier on the test set and compute the following:

True Positives – For a given class (or mood in this case) we count the number of times the NLP classifier predicted that the given class was the true class. (e.g. for class “happy”: Truth = “happy” / Predicted = “happy”)

True Negatives – For a given class (or mood in this case) we count the number of times the NLP classifier did not predict that class, and indeed, the true class was not that class. (e.g. for class “happy”: Truth = “sad” / Predicted = “humorous”)

False Positives – For a given class (or mood in this case) we count the number of times the NLP classifier predicts an incorrect class which is different from the truth. (e.g. for class “happy”: Truth = “sad” / Predicted = “happy”)

False Negatives – For a given class (or mood in this case) we count the number of times the NLP classifier predicts that a data point does not belong to a class, but it does in the ground truth data. (e.g. for class “happy”: Truth = “happy” / Predicted = “sad”)

Most Data Science teams refer to these metrics in one simple concept called the Confusion Matrix as illustrated below, and there are many code libraries in every Data Science programming language that can easily compute this matrix, and these metrics for you.

Image Credit

Now that we have the confusion matrix, we can easily compute more interpretable metrics such as accuracy, precision, recall, and F-Score.

Accuracy – The percentage of correct predictions. A simple metric that can tell us how well our classifier is doing, but does not work very well with imbalanced data. For instance, if the class of “happy” had 10 data points, and the class of “sad” had 10,000 data points, then this metric would yield obscuring results which are not useful.

Formulas

accuracy = correct predictions / all predictions

Or

accuracy = (true positives + true negatives) / (true positives + true negatives + false positives + false negatives)

Precision – Of all the data points that were labeled a certain class, the percentage of them that were labeled successfully.

Formula

precision = true positives / (true positives + false positives)

Recall – Of all the data points that should have been labeled a certain class, the percentage of them that were labeled that class.

Formula

recall = true positives / (true positives + false negatives)

Accuracy was great because it provided us one true number to go by, and now we have to deal with two extra metrics? Not to worry, we have this covered with the F-Score.

F1 – Known as the harmonic mean of precision and recall, it combines these two metrics where an F1 score of 1 is perfect Precision/Recall, while anything less than that is not perfect. While this grately varies depening on the task at hand, an F1 score between 0.7 – 1 is considered pretty good. There are also many variations of the F-score that put emphasis on different things (e.g. puts more emphasis on the Precision or Recall).

Formula

F1 = 2 * (precision * recall) / (precision + recall)

For more information on evaluating machine learning models, check out this post.

There is also the notion of bias, variance, underfitting, and underfitting. Here is how they are related.

Bias – When a classifier makes assumptions about the data and misses the mark in prediction, likely because it was not trained with the right functions that can map the relationships between our data. For a classifier that has high bias, we can say that it underfit to our data.

Variance – When a model’s classifications are different from each other, likely this is because the model has overfit to the training data, and is not able to hit the mark as well on the test data.

These issues can be used by either training different models and using different functions to better model our data, or using regularizers.

For a great resource on the bias-variance trade-off, which is a known concept in Machine Learning, check this article out by Jason Brownlee

Finally, there is the AUC measure or ROC curve which measure how well your classifier can separate between classes. Typically an AUC close to 1 means that your classifier can distinguish between your classes perfectly. This resembles a plot similar to this one:

Image Credit

While, in general, most good classifiers are in the 0.7 – 1 range which look something more like this:

Image Credit

A great resource that explains AUC/ROC in depth can be found here – Understanding AUC – ROC Curve by Sarang Narkhede

Popular Frameworks, Libraries, and Places to Visit in the NLP World

If you want to create NLP classifiers, taking a course may help you cover the theory, but what then? It is very time-consuming to create tokenizers, algorithms, preprocessors, learners, transformers, evaluators from scratch – unless you really want to understand the internals for practice. Most of the time it is advised to use tried-and-tested libraries and frameworks. Below are some very useful NLP frameworks at the moment:

TensorFlow, PyTorch, and Keras – State-of-the art frameworks to help you build Deep Learning classifiers for NLP. While PyTorch gives a lot of granularity and control given the finest of details, it has a steeper learning curve. In contrast, TensorFlow is the easiest to use, with simple abstractions to help you focus more on the classifiers and less on the theory/implementation. Keras is the middle-ground between the two. Pick your tool of choice based on the time you have and what your project requires as all three are popular.

SpaCy – If you quickly want to build NLP code that works blazingly fast in production

NLTK – A great tool for learning about and exploring NLP problems, and sometimes doing research

Scikit-learn – Great resource for supervised / unsupervised learning and general ML

Huggingface – The place to be if you want to build transformers

Gensim – A very powerful library for topic modeling and text similarity analytics

CoreNLP – Your hero if you want to build NLP with Java

Amazon Mechanical Turk – A cheap and scalable solution to labeling NLP data

Resources for Tuning/Optimization

Tools for DevOps and NLP in production

For more such tools see the following articles.

Learning Resources

There are many resources to learn about NLP depending on what level of expertise you have. There are courses, books, GitHub repositories, blogs, and publications you can study. A great resource that explains all of it is this blog post:

How to get started in NLP

The quickest way to learn in my opinion is to learn by doing by following the contents this free repository by fastai – (course-nlp)

Alternatively, if you’re a more advanced NLP practitioner and want to keep up to date with the latest and greatest findings in NLP, subscribing to Arxiv’s Computation and Language news/RSS feed will allow you to read the most recent publications in the field, thus, taking you to the edge of knowledge on this topic.

Conclusion

That’s all folks! I hope that this guide will help someone who wants to understand how to apply NLP techniques to solve their text analytics problems. Cheers, and Huggingface emojis to all of you. 🤗

The Essentialist Testing Guide In 2021

Author: Mihai Avram | Date: 03/21/2021

Everyone in tech says that testing your code is important, but what does this mean? We are constantly bombarded with new testing methodologies and frameworks, and your project partner comes to you excited about involving some new Integration Testing procedure? What should you do when there are so many overwhelming options to make testing work. If you feel this way, this guide is for you, and is meant to explain the most important methods, frameworks, and approaches to testing no matter what your situation is.

What is Testing and Test Driven Development and Why is it Important?

Code testing and Test Driven Development (TDD) are merely just methods to ensure that the code you are writing is doing what it is supposed to do. This may not be needed when you write simple code that adds two numbers; however, as a codebase becomes more complex and deals with many pieces of code that interact together, there are a lot more areas where it could go wrong. This simple guide will introduce the various types of testing methods available out there, well-vetted testing frameworks for popular programming languages, and how to approach code testing from a practical perspective. Let’s begin!

Types of Testing

The main types of testing available out there are Unit Testing, Integration Testing, End-To-End Testing, and Acceptance Testing. Test Driven Development (TDD) is also a meta-concept that encompasses some of these testing methodologies so we will cover this, as well as variations of it. To make the definitions more applicable let’s also envision the following example.

Running Example – Suppose you have a code library that you have built for educators that takes in someone’s grade on a test, analyzes how good it is in comparison to other people’s grades, and returns a report on how they stack up against their peers.

Unit Testing

Informal Definition:

When we test one specific component or function from our codebase and make sure that
it is doing what it is supposed to.

Example:

Let’s say that in our code library we have a function that has to compare someone’s grade to other people’s grades. This comparison function should be tested in detail to make sure that it is doing what it is supposed to.

Integration Testing

Informal Definition:

When we combine two or more specific components that work alongside each other, and test that they are working together as intended.

Example:

In our grade benchmarking code we have a function that reads in someone’s grade and after that, we pass it to a function that compares that grade with other grades. These two functions can be tested together by passing in different inputs and data through them and making sure that the code does what it should and there are no bugs in this functional interaction.

End-To-End Testing

Informal Definition:

Testing a whole codebase and process from the beginning to the end, and all the parts or functions in between.

Example:

We test all of our grade benchmarking code from one end to another. This will entail providing it with the grade of an individual, and running that grade through the benchmarking. Then after that we call the final function to generate a report about the individual. This test covers the whole breadth of our codebase and of course is only applicable for functions and processes that are tied together in one larger process flow that includes an input and an end result.

Acceptance Testing

Informal Definition:

A testing method that really expands upon End-To-End testing and adds the extra requirement that the output of the process should abide by important constraints, business logic, or policy to make sure that it is what we expect all the time, and in the format/style we want.

Example:

Let’s imagine that the output report we generate for the user needs to always have the individual’s grade present, and the grades of other individuals, all rounded to the second decimal place. An acceptance test (among many) would test that these constraints are met and that all the grades present are all rounded to the correct decimal place and there are no null items.

Test Driven Development (TDD)

Informal Definition:

A testing practice and philosophy where one thinks of and writes test cases of a specific function or code task before the actual code is written. This forces the programmer to think of various ways the code can be faulty and then write code with that aspect in mind so that bugs are avoided in the future.

Example:

Let’s rewind the clock and pretend that none of the grade benchmarking code has been yet written. We first have to start with the function that can take the grade as input. Knowing what this piece of code or function should do, we come up with various test cases such as “Is the grade input a positive number?” or “Is it less than the maximum possible grade?” etc. Only after we finish the test cases, we write the actual function and ensure that the function we write will pass our test cases.

Acceptance Test Driven Development (ATDD)

Informal Definition:

A type of Test Driven Development where many team members that bring different perspectives create tests. These different perspectives could cover a wider range of perspectives than just one individual’s TDD ideas.

Example:

Three team members need to code the part that involves the end report generation of users’ grades for the educator. Before they start writing any code they come up with various questions such as “What if the input was of this particular format” or “What problem do we need to solve and show in the report” etc. – which will come up with a variety of tests that can cover the possible solutions to these questions.

Behavior Driven Development (BDD)

Informal Definition:

Yet another adaptation of Test Driven Development and Acceptance Test Driven Development where users must cater their goals to outside business outcomes by asking many questions about what the function to be implemented needs to achieve.

Example:

Three team members and educators meet and discuss the functionality which involves the end report generation for the educator. Before they start writing any code they come up with various questions that are related to the business cases and what is expected in the end use-case specification for the final stakeholders (e.g. educators that need to view the grades for their students). This is an extra step from Behavior Driven Development by focusing more on the end users and stakeholders.

How to Write a Good Test Case

  • Create thoughtful positive test cases to ensure that the most common and popular uses of data will work successfully. For instance, in a banking application, one should test that a currency of 1 can be charged, 10, 100, and even 1,000, and then for 10,000 it should call the user first before making a transaction of such a large size. Make sure these steps work and focus especially on tests that are as close to how your application functions in production as possible.
  • Create thoughtful negative test cases by supplying non-conventional or unacceptable data and making sure that the code is not doing what it is not supposed to do. For instance, in a banking application, when supplying “1000” as a string instead of as a number, it should throw an error instead of charging that value to the user’s account.
  • The more variations of positive/negative test cases, the better, however, focus on the ones closest to what would happen in a live environment for your project.
  • Document your testing code very well with insightful comments and docstrings.
  • Make sure that tests are idempotent, meaning that if they are executed many times, the runs are independent of each other. For instance, let’s imagine that some set-up function is called that initializes a bank account. We want to make sure to remove that bank account object before the next step so that it does not interfere with the next test. In short, make the set-up and tear-down functions for test robust, and transparent.
  • Keep unit test cases separate from each other and don’t blend them together except for when running integration and end-to-end tests.
  • Involve more testers, and especially stakeholders that are closer to the experience of the end-goal (e.g. the bank manager in a banking application) and embrace Behavior Driven Development as much as possible.
  • Make sure that the names of the test cases are reflective and transparent of what the test cases are doing.
  • Start with unit tests, then build up to integration tests, and finally end-to-end tests.
  • If a test case is more manual and administered by a user:
    • Create detailed and easily interpretable test instructions
    • Provide any test data if needed
    • If there are preconditions, make sure they are well documented (e.g. highlight that the user must be on the profile page for the test to work)
    • Have expected results present for the tester to reference
    • If the functionality and results are complex, document these items so that the tester can better interpret the results and be able to test them successfully

For more manual test case scenarios where test cases are administered mostly by quality assurance (QA) specialists and not automated tests, the following video explains the scenario very well.

Popular Testing Frameworks for Popular Programming Languages

PythonPyTest is the most popular framework and best for unit tests; however, if you have different needs on the project, such as a framework that includes behavior driven development, then Behave might do the trick for you. Here are some great articles explaining some of the best Python frameworks for different use cases.

Top 6 BEST Python Testing Frameworks

Top 8 Python Testing Frameworks in 2021

JavaScriptJest is a test framework developed at Facebook and the most popular framework for JavaScript and React. It works with other frameworks like Vue and Angular as well. If you have other preferences such as a full-stack testing framework for Node.js, Mocha has you covered. Here are some articles to point you in the right direction.

Best JavaScript Testing Framework? 5 to Consider

Top 5 Javascript Testing Frameworks

JavaJUnit a popular testing framework that integrates with all major IDEs. There are many tools, however, so pick one that is most aligned with your use cases from the following articles.

Top 10 Testing Frameworks and Libraries for Java Developers

Test AutomationSelenium is one of the best frameworks for automating test cases on the web, and if you have more specific test automation use cases you can check out the following article that explains which libraries are best for which use cases.

Top 10 Test Automation Frameworks in 2020

If You Have an Unlimited Budget What You Should Do?

If you have a lot of resources and a big team, it is highly encouraged to prioritize testing and test cases. A general rule of thumb is to capture 70-80% of code coverage which is essentially the percentage of code that is covered by test cases. This percentage should also increase with the cost of failure. For instance, if we are building a rocket to get us to Mars, a failure may have a catastrophic result with many lives lost, not to mention all the resources and time that went into building the rocket to get us there. So code coverage in a critical case like this should be 100%. The same goes for code that has human lives in its hands such as autonomous vehicles.

What Should You Do at the Very Least, No Matter What Your Situation is?

If you don’t have many resources, time, and no team to build test cases with, it is still good to have some test cases present. Which test cases though? Focus mostly on end-to-end tests and tests which touch the most critical parts of your application. Let’s say you are building software that is in charge of delivering Personal Protective Equipment (PPE) to healthcare workers, then make sure that any piece of code or algorithm in charge of the delivery process is running under test cases. All the other more peripheral and non-critical functions can wait until you have more time, funds, or a larger team.

Conclusion

There you have it, I hope you understand the current testing landscape a bit better and can create more robust and error-free code for your projects. There are many test cases and theoretical frameworks for all the programming languages, so if you are using a more niche framework such as Rust or Ruby – a google search will be your best friend.

Understanding The Blockchain Ecosystem From The Ground Up

Author: Mihai Avram | Date: 12/08/2020

There is no doubt about it that Blockchain has started exploding both as a topic and technology for a few years now. Maybe you are a professional who simply has seen the word blockchain too many times and want to learn it once and for all. Or maybe you are a blockchain enthusiast who wants to dive in deeper in understanding the internals of the blockchain ecosystem. In both cases, you came to the right article place!

Here we will cover:

  • How blockchain technology works
  • What blockchain is used for and what industries use it
  • What programming languages to use to build a blockchain
  • What are the leading providers of blockchain technologies
  • How to build a blockchain from the ground up (with code)
  • How to learn more about blockchain

If you want to learn any of these notions then keep reading!

What is Blockchain and How Does it Work

In a nutshell, blockchain is a piece of technology that ensures that transactions (e.g. paying for your groceries, a doctor visit, an artist signing a record label contract, etc.) are transparent in a securely decentralized fashion, so there is no longer a need for a central authority (such as a bank or government) to oversee or regulate it. Because blockchain is also built with privacy in mind, it is very difficult to alter or tamper with.

In order to understand how blockchain does this and how it works, let’s envision the following example:

Simple Blockchain Example

Imagine that you and two other friends (let’s call them Friend 1 and Friend 2) are using a blockchain to update your shared expenses online. All three of you will have a file on your computers that automatically updates when you buy or sell an item, either from the internet or from each other. You buy some tickets to a concert, and when you do, your computer quickly updates your file and sends copies of your file to your friends. Once your friends receive those files, their computers quickly check if your transaction makes sense (e.g. did you have enough money to buy the tickets, and it is really you who is buying the tickets). If both friends agree that everything checks out, everyone updates their file to include your transaction. This cycle repeats for every transaction that either you or your friends make so that all three of your files are synced up, and there is no authority to oversee the process.

There is of course a bit more nuance to it and gets very technical very quickly in understanding to build such a system from a programming perspective. If you want to understand how blockchain works in-depth, you can read the academic paper by Satoshi Nakamoto who created the first blockchain database

Original blockchain paper by Satoshi Nakamoto (link)

What is Blockchain Used For?

Blockchain is quickly becoming very widespread where almost every industry is touched by this technology. For inspiration, here are just a handful of examples of how Blockchain is used today.

Monetary Payments – Blockchain used in monetary transactions creates a more efficient and secure payment infrastructure.

Global Commerce – Global supply chains are governed by blockchain technologies to ensure a more efficient transactional trade system.

Capital Markets – Blockchain enables audit trails, quicker settlements, and operational improvements.

Healthcare – Secondary health data that cannot identify an individual by itself can be placed on the blockchain which can then allow administrators to access such data without needing to worry about the data all being in one place which makes it very secure.

Energy – Utility processes such as metering, billing, emission allowances, and renewable energy certificates all can be tracked via blockchain transactions in one decentralized place.

Media – Media companies use blockchain to protect IP rights, eliminate fraud, and reduce costs.

Voting – The notion of each vote being in a decentralized blockchain solves the problem of elections being hacked or tampered with.

Cybersecurity – Blockchain solutions in the security space ensure that there is no single point of failure, and it also provides privacy as well as end-to-end encryption.

Other real-life examples exist in Regulatory Compliance and Auditing, Insurance, Peer-to-Peer Transactions, Real Estate, Record Management, Identity Management, Taxes, Finance Accounting, Big Data, Data Storage, and IoT among many others.

What are the Most Popular Types of Cryptocurrency?

Bitcoin – The cryptocurrency that started it all. It was started in 2009, and follows closely to the original Satoshi Nakamoto cryptocurrency paper referenced earlier. It is mostly used for monetary transactions.

Litecoin – Crated in 2011 as an alternative to Bitcoin. Litecoin is a little faster than Bitcoin, has a larger limit and, operates on different algorithms.

Ethereum – Ethereum was created in 2015 and is also focusing on decentralized applications with smart contracts instead of just monetary transactions. This way different transactions outside of monetary exchange can happen, such as digital trading cards, or IoT activations on a smart-grid network.

Ripple – A cryptocurrency that is not blockchain-based. However, it is often used by companies to move large amounts of money quickly across the globe.

For a more extensive list, check out these resources.

  • An ever-growing list of cryptocurrencies on Wikipedia (link)
  • Understanding The Different Types of Cryptocurrency by SoFi (link)
  • Types of Cryptocurrency Explained by Equity Trust (link)

What are the Best Programming Languages to Develop Blockchain?

C++ – Best if you need to build a blockchain from scratch or change some low-level internals of how blockchain works.

Solidity – Best if you are set on using the Ethereum Blockchain framework and platform.

Python – Best if you want to bring blockchain to general-purpose apps, especially in Data Science.

JavaScript – Best if you want to build a blockchain for the web.

Java – Best if you want to build a general, and large-scale object-oriented application.

There are, however, blockchain developments in almost all programming languages, so pick the one you’re most comfortable with or is required for the project.

What are the Leading Providers of Blockchain Technologies

Coinbase – A very secure and free API that supports many different cryptocurrencies such as bitcoin and ethereum, and also supports different blockchain transactions such as generating digital wallets, getting real-time prices, and crypto exchanges. Use it if you want to create blockchain apps cost-effectively.

Bitcore – Another free and speedy option with many different blockchain transactions possible. Use it if you want to build very fast blockchain applications with quick transaction times.

Blockchain – The oldest and most popular blockchain framework. It has a large developer community and low timeouts. Use it if you need to implement blockchain wallet transactions.

For a more extensive list check out the following resources.

  • Top 10 Best Blockchain APIs: Coinbase, Bitcoin, and more (link)
  • How to Choose the Best Blockchain API for Your Project by Jelvix (link)

How to Learn More About Blockchain

The fastest way to learn about blockchain is to first take a course, and then start building one yourself. If you’re also serious about blockchain and want to learn it continuously, you should subscribe to some blockchain newsletters.

Here are some links to the courses. Look for the ones with the highest ratings and popularity:

  • [Top 10] Best Blockchain Courses to learn in 2020 (link)
  • 10 Best Blockchain Courses and Certification in 2020 (link)

Also, if you want to build a blockchain, check out this well-sourced Quora post. Furthermore, here is a list of good newsletters to learn more about blockchain from your inbox!

How to Build a Blockchain, a Brief Introduction (With Code)

Let’s build a simple blockchain so that we can understand some of the more subtle nuances of one. The most important inner workings of a blockchain are the following. The chain itself which stores transactional information, a way to mine new possible slots in the chain, the proof of work that identifies if the chain is valid, and a consensus algorithm that can allow nodes or computers to vote whether the chain is valid. The code will label these important notions as #CHAIN step, #MINING step, #POW step, and #CONSENSUS step respectively to trace back to these notions. Note that there is an important aspect of the proof of work. The proof of identifying if a new block is valid should very easily be verified; however, it should be very hard to create from scratch (mining a new block). This property is important because it allows us to easily validate if a blockchain is not tampered with, and prevents hackers from re-creating a blockchain easily (it becomes immutable). We will build all these things below. Pay close attention to the comments as they explain the purpose of each component. Also, note that some functions, such as (is_valid_proof_pattern, get_blockchain, block_matches_proof, etc.) have yet to be implemented to keep this post short, so just imagine that they exist and that they do what they are supposed to do.

Note: that the code below is not an exact replica of a blockchain. Instead it is a simplified representation which can be used for inspiration/intuition and not for rigorous implementation of a blockchain.

Blockchain Server Code

""" Blockchain Server Code

On the blockchain server is where we store the main
implementation of the blockchain. The clients (or apps
such as your banking app) would hit a server like this
as they create new transactions and store them on the
blockchain, or as miners try to mine new blocks.
The classes and code below represents the code that
sits on the blockchain server.
"""


# Imports

from datetime import datetime  # Generates unique timestamps
import hashlib  # Used for hasing our blocks


# Classes

class Transaction():
  """
    A given monetary transaction.
    Example: Joe pays Amy 10 mBTC.
  """
  __init__(self, frm, to, amount):
    self.frm = frm
    self.to = to
    self.amount = amount


class Block():
  """
    A block on the blockchain containing blockchain
    transactions. Note that every block has a hash
    that is associated to previous blocks.
  """
  __init__(self,
           index,
           previous_hash,
           proof_of_work,
           timestamp,
           transactions):

    self.index = index
    self.previous_hash = previous_hash
    self.proof_of_work = proof_of_work
    self.timestamp = timestamp
    self.transactions = transactions


class Blockchain():
	"""
		The blockchain containing various blocks
		that build on each other as well as methods
		to add and mine new blocks. (# CHAIN step)
	"""
	__init__(self):
		self.blocks = []
		self.all_transactions = []

		# Every blockchain starts with a genesis first block
		genesis_block = new Block(
			index=1,
			previous_hash=0,
			proof_of_work=None,
			timestamp=datetime.utcnow(),
			transactions=self.all_transactions
		)

		self.add_block(genesis_block)


	@staticmethod
	def add_block(block):
		"""Adds a new block to the blockchain.

		   Args:
		       block (Block class): A new block for the
			                        blockchain.

		   Returns:
			   None
		"""
		self.blocks.append(block)


	@staticmethod
	def add_new_transaction(transaction):
	    """Adds a new transaction to the blockchain.

		   Args:
		       transaction (Transaction class): A new transaction
			                                    for the blockchain
		   Returns:
			   None
	    """
	    self.all_transactions.append(transaction)


	@staticmethod
	def get_full_chain():
	    """Returns all the blockchain blocks.

           Returns:
	           all_blocks (List[Block class]): All the blocks in
			                                   the blockchain.
	    """
	    all_blocks = self.blocks
	    return all_blocks


	@staticmethod
	def get_last_block():
	    """Gets the last block in the blockchain.

           Returns:
	           last_block (Block class): The last block in the
			                             blockchain.
	    """
	    last_block = None
	    if self.blocks:
	        last_block = self.blocks[-1]

	    return last_block


    @staticmethod
    def hash(block):
        """Computes a hashed version of a block and returns it.

           Args:
               block (Block class): A block in the blockchain.

           Returns:
               hashed_block (str): A hash of the block.
        """
        stringified_block = json.dumps(
			block, sort_keys=True
		).encode()
        hashed_block = hashlib.sha256(
			stringified_block
		).hexdigest()
        return hashed_block


	@staticmethod
	def mine_new_block(possibilities):
	    """An attempt to mine a new block in the blockchain.
           (# MINING step)

	       Args:
		       possibilities (List[Possibility class]):
			   	All possibilities for mining that the
				miners compute/create.
		   Returns:
		       reward (str): A reward for the miners if they
			   				 succeed.
	    """

        last_block = self.get_last_block()

		# Go through many possible proofs, which is equivalent to
		# using computational power, to find the new block.
		for possibility in possibilities:
			mining_success = False
			previous_hash = self.hash(last_block)
			possible_proof = hashlib.sha256(
				possibility
			).hexdigest()

			# We imagine this method exists (# POW step)
			if is_valid_proof_pattern(possible_proof,
									  previous_hash):
				# Our possible proof was correct, so miner was
				# able to mine a new block!

				# Forge the new Block by adding it to the chain
				index = last_block.index + 1
				proof_of_work = possible_proof
				timestamp = timestamp.utcnow()
				transactions = self.all_transactions

				new_block = new Block(
					index,
					previous_hash,
					proof_of_work,
					timestamp,
					transactions
				)
				self.add_block(new_block)

				# The mining was a success, we stop mining
				mining_success = True
				break

		# Give reward to miner if mining was a success
		reward = '0 mBTC'
		if mining_success:
		    reward = '0.1 mBTC' # The reward can be anything

		return reward

In short, the server code contains a blockchain which contains blocks and transactions. Miners can use computational power to mine new blocks and as an incentive for doing so, they get rewarded. Consumers can add transactions to the blockchain (e.g. you pay a friend back for lunch) and that transaction will then live on the blockchain. The blockchain is really then a chain of transactions that have the property of being tied to one another and able to be verified if that tie is correct or not.

Client Code Accessing The Blockchain

""" Client Code Accessing The Blockchain

The client or blockchain application that gets
API requests for new transactions. It primarily
interacts with the blockchain server from above,
but has some internal helper functions to store the
new transactions. Note that there could be dozens if
not thousands of these clients that do the same things
as decentralized transactions are written to the
blockchain. Imagine an app like Apple Pay where
everyone is paying each other, client connections
like these would register the transactions on the
blockchain. Below are the client helper functions and
code.
"""


# Functions

def check_consensus(all_nodes, our_blockchain):
    """Compares our blockchain with blockchains from
	   other nodes in the network, and attempts to
	   find the longest valid blockchain, and returns it.
       (# CONSENSUS step)

       Args:
	       all_nodes (List[Node class]): All nodes in
		   								 the network.
	       our_blockchain (Blockchain class): Our blockchain.

       Returns:
           longest_valid_blockchain (Blockchain class):
		   		The longest valid blockchain.
    """
	longest_valid_blockchain = our_blockchain
	longest_blockchain_len = len(
		our_blockchain.get_full_chain()
	)

	for node in all_nodes:
		# Imagine the get_blockchain method exists on the node
		node_blockchain = node.get_blockchain()

		is_valid_chain = True
		for block in node_blockchain.get_full_chain():
			# Imagine the block_matches_proof method exists
			if not block_matches_proof(block):
				is_valid_chain = False
				break

		current_blockchain_len = len(
			node_blockchain.get_full_chain()
		)
		if (is_valid_chain
		    and current_blockchain_len > longest_blockchain_len):
			longest_valid_blockchain = node_blockchain
			longest_blockchain_len = len(
				node_blockchain.get_full_chain()
			)

	return longest_valid_blockchain


def get_other_nodes_in_network():
	"""
	    Returns all nodes, or servers/computers in the network.
	    Code not written here as it is application dependent.
	"""
	return all_nodes


def get_our_stored_blockchain():
	"""
	    Retrieves the current blockchain on our node or server.
	    Code not written here as it is application dependent.
	"""
	return our_blockchain


def set_our_stored_blockchain(new_blockchain):
	"""
	    Sets the current blockchain on our node or server.
	    Code not written here as it is application dependent.
	"""
	return status


# Now let's say that Joe wants to pay Amy 10 mBTC and
# the client prepares this transaction to write it
# to the blockchain. This is roughly what happens below.

# We first prepare the transaction
frm = 'Joe'
to = 'Amy'
amount = '10 mBTC'
new_transaction = new Transaction(frm, to, amount)

# Then we get the longest valid blockchain we can write our
# new transaction to.
our_blockchain = get_our_stored_blockchain()
all_nodes = get_other_nodes_in_network()
longest_valid_blockchain = check_consensus(
	all_nodes, our_blockchain
)
if our_blockchain != longest_valid_blockchain:
	# We have an out of date or invalid blockchain
	# so we update our blockchain as well.
	set_our_stored_blockchain(longest_valid_blockchain)
	our_blockchain = get_our_stored_blockchain()

# Now that we have the current up-to-date blockchain
# we simply write our new transaction to our blockchain.
our_blockchain.add_new_transaction(new_transaction)

All the client code needs to do is to make sure that the blockchain it is working with is up to date by checking the consensus between all the nodes (or servers) in the blockchain network. After the client code has the proper and up to date blockchain, a new transaction can be written.

Code That Miners Use

""" Code That Miners Use

The miners also leverage the blockchain server from above. 
The role of the miners is to come up with compute possibilities 
to create new blocks using compute power. They first retrieve 
the most current blockchain, and then try to mine a new 
block via calling the following methods, and getting rewarded 
in the process if they are successful.
"""

# Code for the generate_possibilities function is application 
# dependent.
possibilities = generate_possibilities()  
reward = current_blockchain.mine_new_block(possibilities)

As the miners keep mining new blocks, the blockchain grows and more transactions can be stored on the blockchain. With understanding the server, client, and miner parts of the blockchain lifecycle you should have a good understanding of different components of a blockchain. There are also more intricacies to a blockchain than the components covered here, such as the details of the proof of work, how transactions are stored, hashed, and regulated, double spending, the verification process, and much more. Taking a course is one of the best ways to understand these nuances.

Below are some resources to other simple blockchain implementations if you’re curious.

Learn Blockchains by Building One (link)

Simple Blockchain in 5 Minutes [Video]

In Conclusion

Well, there you have it, a good primer on this new technology that is dawning upon us. I hope that by understanding blockchain high-level and by diving deeper into the links provided, you can become proficient with blockchain in no time!

Why I Built a First of its Kind Social Impact and Self Improvement Tracking App?

Welsome - An app that helps us be better humans with our actions

Author: Mihai Avram | Date: 10/11/2020

Since social media became ubiquitous around the early 2000s it often seemed like our world was slowly crashing and burning. From the environmental, to the social, and eventually to the individual. Pollution, deforestation, global warming, misinformation, child trafficking, poverty, racism, sexism, corruption, pandemics, obesity, heart disease, anxiety, depression, and so much more. To make matters worse, over time I have been growing more and more tired of us continuing to uncover, discuss, and learn about these problems without actually taking a step in the direction to solve them. Granted there are initiatives, movements, academic efforts, and technology to fight just about every one of these issues, not to discredit those; however, I simply did not think we are doing enough.

This is why I decided to create a first of a kind impact tracking app that empowers us to make impactful choices in our lives and can incrementally work towards solving some of these problems both to improve ourselves and to make the world a better place.

One action at a time.

Welsome – The Impact Tracking App

In 2019, I began the journey of creating a platform that can achieve this vision, called Welsome. The idea is simple; the user community or moderators create activity content for various categories that the users care about. For instance, one category could be climate change, and there would be dozens of activities that users can partake in so that they can contribute to reducing their carbon footprint and fighting climate change. Examples include recycling plastic, walking or biking instead of driving, eating a plant-based diet, and many others. These activities would include details about the CO2 emissions reduced, water consumption reduced, and other metrics that reflect real-world impact. By the same token, there would be activities that users can engage in, track, and challenge each other in any other categories such as being healthier, mitigating the spread of Covid-19, and much more.

The Vision For Welsome

The uncompromising long-term vision for Welsome is to provide an environment for people to feel empowered to make a difference, both in their lives, and in the lives of others around them, and also to be rewarded for it, internally and externally. The word “Welsome” originates from middle english and is defined as being prosperous and in good condition. I hope that the app can show reverence for this definition and serve as a guiding compass for creating a prosperous people, and a prosperous world.

How Does Welsome Work?

Welsome is a mobile app available for Android and iOS where you can:

  • Subscribe to any activity category of your choice (e.g. health or climate change).
  • Get daily insights and reminders on actionable ways you can improve yourself and the planet, based on the category you subscribed to.
  • Remind yourself of things you can do to achieve your goals (e.g. go to bed earlier 5 times this week, or recycle 20 plastic items this month).
  • Create goals for yourself, track your progress, and get rewarded for your accomplishments.
  • Connect with and join activity challenges with friends.
  • Contribute to community-based collaborative challenges that come with rewards (e.g. a gift card to socially impactful organizations such as Allbirds for completing a community recycling challenge).
  • Win rewards from your accomplishments.
  • Track your progress and your self-improvement and social-impact journey.

To highlight some of these features, below you may see the Welsome app in action.

Social Impact and Self Improvement Activity Features And Insights

Social Goals, Challenges, and Rewards

Join The Movement And Beta!

If you feel the same way, come and embark on this collective journey to improve ourselves and make the world a better place, one action at a time.

Welsome Website – https://welsome.org

Beta Links

Android Beta Link
https://play.google.com/apps/testing/com.welsome.app

iOS Beta Link
https://testflight.apple.com/join/gM9XZX1V

Fierce, but Fragmented Competition

As I continued to build Welsome and surveyed any possible apps, startups, and organizations that are doing similar things I stumbled across some important points. The organizations that are impact-driven focus a lot on corporate social accountability such as the product called Xocial, which empowers organizations and their employees to be more impact driven. Big tech is doubling down on health and fitness where we see Fitbit, Strava, and Apple Health as some leaders in this space. There are also a few organizations that are looking at the impact tracking from a more holistic perspective, such as StickK for achieving goals using social and monetary contracts, and Exist which is one of the most comprehensive life tracking services. The conclusion to be drawn from all this is that no other organization is looking to combine activity tracking, general self-improvement as well as social impact in one service and allow people to track and be empowered by the impact that results from their actions. This, I hope to be Welsome’s contribution to the world.

Final Words

That’s all I have for now, I will continue publishing posts and keeping everyone updated on the progress and vision for Welsome. Additionally, if you have any feedback, advice, or want to collaborate, feel free to reach out to me at mihai.v.avram@gmail.com.

Stay healthy and safe, and cheers.
Mihai Avram – Founder of Welsome

The State of Full Stack Tech in 2020

Author: Mihai Avram | Date: 08/07/2020

Technology changes at such a rapid pace that it is difficult to keep up. One moment we learn the latest and greatest new front end framework only to find out that a few months later a new contender may come to take its place. How can we best use our time as developers by choosing what technologies to invest our time and money in? Look no further than here where we will take a journey through the best frameworks to learn at this moment in time for various different full stack needs such as front end development, back end development, machine learning, databases, and more. We might as well pick the best frameworks to learn now so that we don’t have to spend extra time learning another similar framework too soon.

Front End Frameworks

When it comes to front end web development, learning JavaScript, HTML, and CSS will provide the basis of your skillset. Then, if you want to pick the best modern framework, it will likely depend on a few factors.

Best by Popular Demand

React

Reference from Wikimedia Commons

As of July 2020, React has 6,600 watches, 153,000 stars, and 29,900 forks, which is more than any other front end framework on GitHub. Moreover, the latest StackOverflow survey from 2019 mentions React as the most loved web framework. Finally, the 2019 State of Javascript survey also states that React is the framework with most satisfaction and awareness. All these accolades combined shows that an overwhelming majority of developers prefer React over the other front end frameworks. A close runner-up to React in popularity is Vue.js.

Best for Getting a Job

React

Reference from Wikimedia Commons

As of July 2020, a search for React on some of the most prominent job board websites such as LinkedIn, ZipRecruiter, Indeed, and Glassdoor have yielded tens of thousands of open jobs which is more than other front end frameworks.

LinkedIn: 35,104 (searched ‘Reactjs’)
ZipRecruiter: 22,770 (searched ‘React developer’)
Indeed: 10,487 (searched ‘React developer’)
Glassdoor: 5,155 (searched ‘React developer’)

Some runner-ups for front end frameworks most in demand are AngularJS and Vue.js.

Best for the Highest Salary

Three-way tie between React, Vue.js, and AngularJS

References from Wikimedia Commons (React, Vue, Angular)

As of July 2020, a ZipRecruiter average salary search for these three frameworks yielded the following:

React: $110,278/year
Vue.js: $116,615/year
AngularJS: $112,004/year

This is close enough to render a tie, so pick the one you are most comfortable with, or pick the most popular one and stick with it.

Easiest to Learn

Vue.js

Reference from Wikimedia Commons

This is because the rules of the framework are very simple to understand, require very little code, and the documentation is very well written as well as aesthetically pleasing. A close runnerup to front end learning simplicity is React.

Back End Frameworks

There must be something that can tie in all the logic and provide data power to all the pretty websites and apps. Back end frameworks are a bit more crowded than the front end frameworks; though luckily there are some clear winners.

Best by Popular Demand

Node.js

Reference from Wikimedia Commons

As of July 2020 on GitHub, Node.js has 2,900 watches, 71,500 stars, and 17,400 forks, which is more than any other back end framework.
Moreover, Node.js was among the top frameworks listed for the most loved frameworks in the 2019 StackOverflow survey, and Express (which is a Node.js framework) is listed as the most satisfying back end frameworks to use in the State of Javascript 2019 survey. Some popular back end framework runner-ups include Spring Boot, Django, ASP.NET, Laravel, and Flask.

Best for Getting a Job

Node.js

Reference from Wikimedia Commons

As of July 2020, a search for Node.js on some of the most prominent job board websites such as LinkedIn, ZipRecruiter, Indeed, and Glassdoor have yielded tens of thousands of open jobs which is more than other back end frameworks. Some in-demand back end framework runner-ups include ASP.NET, Spring Boot, Ruby On Rails, and Django.

LinkedIn: 13,098 (searched for ‘Node.js’)
ZipRecruiter: 11,322 (searched for ‘Node.js’)
Indeed: 5,856 (searched for ‘Node.js’)
Glassdoor: 5,670 (searched for ‘Node.js’)

Best for the Highest Salary

Ruby on Rails and Node.js

Reference from Wikimedia Commons (Rails, Node)

As of July 2020, a ZipRecruiter average salary search for these two frameworks yielded the following:

Ruby on Rails: $114,900/year
Node.js: $113,697/year

This is close enough to render a tie, so pick the one you are most comfortable with, or pick the most popular one and stick with it. Moreover, some high paying back end framework runner-ups include Spring Boot, Django, and ASP.NET.

Easiest to Learn

Ruby on Rails

Reference from Wikimedia Commons

Many developers refer to Ruby on Rails as a magical framework that is both intuitive to understand, and which can accomplish a trove of powerful features and functionality with little code. Some easy to learn runner-ups in the back end framework category include Django, Flask, and Laravel.

Databases

There are not too many database frameworks to choose from, and most importantly one must know the difference and use-cases of the different types (SQL vs. No-SQL). Fortunately, this article curated by the Xplenty team describes the difference very well.

Best by Popular Demand

MySql

Reference from Wikimedia Commons

According to the latest StackOverflow developer survey of 2020, MySql was ranked as the best database technology to use. This is also consistent with other database surveys from DB-Engines, ScaleGrid, or JavaTPoint where MySql makes it among the top. Some popular database runner-ups include PostgreSQL and Redis.

Best for Getting a Job

SQL Server

Reference from Needpix

As of July 2020, a search for SQL Server on some of the most prominent job board websites such as LinkedIn, ZipRecruiter, Indeed, and Glassdoor have yielded tens of thousands of open jobs which is more than other database technologies. Some in-demand database runner-ups include MySql and PostgreSQL.

LinkedIn: 29,049 (searched ‘SQL Server’)
ZipRecruiter: 45,948 (searched ‘SQL Server’)
Indeed: 10,079 (searched ‘Microsoft SQL Server’)
Glassdoor: 22,690 (searched ‘SQL Server’)

Best for the Highest Salary

A two-way tie between PostgreSQL and MongoDB

Reference from Wikimedia Commons (Postgres, Mongo)

As of July 2020, a ZipRecruiter average salary search for these two database technologies yielded the following:

PostgreSQL: $127,785/year
MongoDB: $120,379/year

Some high paying database runner-ups include Redis and MySQL.

Easiest to Learn

SQLite

Reference from Wikimedia Commons

As the name suggests, SQLite is a stripped-down version of SQL that allows one to learn the syntax and basics of SQL without having to get into the more complex items such as triggers, writable views, and other administrative or niche functional items that traditional databases support. However, it is highly advised and recommended that one starts with a full-SQL database first such as MySQL or Postgres which are only a little more time to understand.

Machine Learning Frameworks

It is important to note for Machine Learning frameworks, there is a lot of variability in which tool to use for the job based on many circumstances. This is including whether one is working on a research project, a production grade solution, a quick and dirty solution, and various other criteria. Hence, please take the following information with a grain of salt.

Best by Popular Demand

Tensorflow

Reference from Wikimedia Commons

As of July 2020 on GitHub, TensorFlow has 8,300 watches, 147,000 stars, and 82,100 forks, which is more than any other Machine Learning framework. TensorFlow also appears among the top contending Machine Learning frameworks according to various blogs and forums such as from KDnuggets and Open Data Science. Some close runner-ups in popular Machine Learning frameworks include Keras, Scikit-learn, and PyTorch.

Best for Getting a Job

Apache Spark

Reference from Wikimedia Commons

As of July 2020, a search for Apache Spark on some of the most prominent job board websites such as LinkedIn, ZipRecruiter, Indeed, and Glassdoor have yielded thousands of open jobs which is more than other Machine Learning frameworks. Some runner-ups for in-demand Machine Learning frameworks include Tensorflow, PyTorch, and Keras.

LinkedIn: 14,564 (searched ‘Apache Spark’)
ZipRecruiter: 2,677 (searched ‘Apache Spark’)
Indeed: 1,774 (searched ‘Apache Spark’)
Glassdoor: 1,050 (searched ‘Spark Developer’)

Best for the Highest Salary

A two-way tie between Keras and TensorFlow

Reference from Wikimedia Commons (Keras, TensorFlow)

As of July 2020, a ZipRecruiter average salary search for these two Machine Learning frameworks yielded the following:

Keras: $156,040/year
TensorFlow: $148,508/year

Some runner-ups for the highest paying Machine Learning frameworks to know are Apache Spark and Scikit-learn.

Easiest to Learn

Scikit-learn

Reference from Wikipedia

Scikit-learn has very intuitive and easy to use documentation in which there are tutorials and examples which are provided for all standard Machine Learning needs such as Regression, SVMs, Naive Bayes, Clustering, and others. Moreover, Scikit-learn integrates seamlessly with other intuitive Mathematical libraries that can simplify the understanding and usage of Machine Learning concepts. These libraries include NumPy, Pandas, SciPy, and Matplotlib among others.

What are some runner-ups?

None because when it comes to Machine Learning, the fundamental Mathematical and Statistical concepts are the most important to learn. Scikit-learn provides an easy way to learn these concepts through documentation and practical examples. Other tools such as TensorFlow, PyTorch, Keras, or Apache Spark enable more specialized Machine Learning cases in which more of a Machine Learning proficiency is needed.

Mobile Development Frameworks

Mobile frameworks tend to change at a very rapid pace, so take the following information with a grain of salt and try to pick the ones that you think will be the most robust to changes in the future.

Best by Popular Demand

A two-way tie between React Native and Electron

Reference from Flick and Wikimedia Commons (React Native, Electron)

As of July 2020, both React Native and Electron have the most GitHub popularity metrics such as watches, stars, and forks. Moreover, according to the 2019 State of Javascript survey, both of these frameworks have been rated as the most popular in the mobile framework space. Some close runner-ups in the popular mobile frameworks space are Swift and Cordova.

Best for Getting a Job

React Native

Reference from Flickr

As of July 2020, a search for React Native on some of the most prominent job board websites such as LinkedIn, ZipRecruiter, Indeed, and Glassdoor have yielded thousands of open jobs which is more than other mobile frameworks. In demand runner-ups for mobile frameworks include Swift, and Cordova.

LinkedIn: 3,375 (searched ‘React Native’)
ZipRecruiter: 3,018 (searched ‘React Native’)
Indeed: 2,333 (searched ‘React Native’)
Glassdoor: 2,426 (searched ‘React Native’)

Best for the Highest Salary

Swift

Reference from Wikimedia Commons

As of July 2020, a ZipRecruiter average salary search for Swift developers yielded the following:

Swift: $127,276/year

Some high paying mobile framework runner-ups include React Native, and Ionic.

Easiest to Learn

React Native

Reference from Flickr

According to a crowdsourced survey by StackShare, React Native is the easiest to learn out of all the mobile frameworks. Technically Vue Native might be easier; however, it is by far not as popular and common than React Native so it is not worth learning as much as React Native is.

Other Important Aspects of Full Stack Development

Now that we covered most of the technology stacks, let’s take a step back and understand some pieces of software that serve as the glue to technology. This consists of operating systems, hosting software, testing frameworks, IDEs, DevOps software, and more. Below you may find some honorable mentions in each of these categories. These are essentially the top contenders for their respective groups and markets.

Platforms

Linux – Best open-source, lightweight, and powerful OS

Docker – Best for shipping and running software in a stable environment

Kubernetes – Best for shipping and running clustered software in a stable environment

AWS – Most powerful and all-encompassing hosting solution

GCP – A growing, easier to use, and cheaper hosting solution

Azure – The best hosting solution for Microsoft-first products

Heroku – Best for simple full stack hosting solutions

WordPress – The most popular website hosting solution

Digital Ocean – Simple web or app hosting service with fast loading times and high SLA

Firebase – Great hosting infrastructure for mobile apps

Elasticsearch – Best for text storage, search, and analytics

DevOps

Gradle and Jenkins – Best for software build automation

Git – Best for version control

Slack – Most powerful and most adopted communication software

Sentry – Best for application monitoring and alerting

Insomnia – Best for sending and testing requests over the internet

The Silver Searcher – Best for quick directory and file system searches

Notion – Best for creating and storing documentation/wiki

Jira and Asana – Best for Agile/DevOps practices

Trello – Best for Kanban board organizational practices

Puppeteer – Best for browser automation

Linting – Great for making sure good code is written

TypeScript – Great for making sure that the code handles the data and variables as intended

Testing

Robot and PyTest – Best for Python testing

Jest and Mocha – Best for JavaScript testing

Selenium – Best for web app testing and browser automation

Integrated Development Environments (IDEs)

Visual Studio – Best for Windows users

Sublime Text – Powerful and easy to use lightweight editor

Atom – Best for language-agnostic Mac and Linux users

Vim – One of the most powerful lightweight editors with a steeper learning curve

That’s all folks! 🎊 Happy coding 🎊

Why Use Machine Learning Pipelines and What Frameworks Exist for Them?

Author: Mihai Avram | Date: 5/17/2020

Machine Learning has evolved far beyond just training a model on data and running that trained model to return classification results. In order to efficiently build Machine Learning solutions that effectively run in production environments, we must expand our solutions to be able to provision, clean, train, validate, and monitor the data and model at scale. This requires a new exemplary skillset called a Machine Learning pipeline.

Scikit-learn is a very popular Machine Learning framework, so let’s frame this idea around it and start with a simple pipeline example.

A Simple scikit-learn Machine Learning Pipeline

Scikit-learn is one of the most popular machine libraries implemented in Python, and the key is the Pipeline package from sklearn.pipeline as shown in the code. We start with the following code.

from sklearn.linear_model import LogisticRegression
from sklearn.pipeline import Pipeline
from sklearn.preprocessing import StandardScaler

# Retrieving our data using our custom function
x_vals, y_vals = load_in_raw_data()

# Building the pipeline
pipeline = Pipeline([
    ('scalar_step', StandardScaler()),
    # More data preprocessing steps can go here
    ('dimensionality_reduction_step', PCA(n_components = 3)),
    ('classification_step', LogisticRegression())
])

# Running our pipeline against our data to fit and create the model
pipeline.fit(x_vals, y_vals)

Let us go through the code step by step.

from sklearn.linear_model import LogisticRegression
from sklearn.pipeline import Pipeline
from sklearn.preprocessing import StandardScaler

Here we import all of the packages needed from the scikit-learn library in order to build our pipeline. You may need to import more of them based on the problem you have at hand and the steps involving your pipeline. For instance, if your pipeline involves a Naive Bayes classifier, then the following import would be needed.

>>> from sklearn.naive_bayes import GaussianNB

Next,

# Retrieving our data using our custom function
x_vals, y_vals = load_in_raw_data()

We leverage a function we have created in our code load_in_raw_data() which is not included in this post because it is open to interpretation and varies from case to case. For instance, this function could load the popular Iris Data Set from the UCI ML Repository via sklearn.datasets.load_iris() or it could simply load a file from disk.

Afterward,

# Building the pipeline
pipeline = Pipeline([
    ('scalar_step', StandardScaler()),
    # More data preprocessing steps can go here
    ('dimensionality_reduction_step', PCA(n_components = 3)),
    ('classification_step', LogisticRegression())
])

We build our pipeline by providing a sequence of transformations that our dataset will go through. These transformations will happen in the sequence they are provided, so the scalar_step, will happen before the dimensionality_reduction_step. Note that you can include different transformations and as many as you would like depending on the Machine Learning problem you are looking to solve.

Finally,

# Running our pipeline against our data to fit and create the model
pipeline.fit(x_vals, y_vals)

We run our data through our pipeline to create and fit our model to our resulting values provided (y_vals). You can later use that model to predict future y values based on new x values.

And voila! That’s the skinny on scikit-learn pipelines, for more information, you can check out the following three resources, which can fortify your knowledge of scikit-learn pipelines.

Scikit-learn documentation – (https://scikit-learn.org/stable/modules/generated/sklearn.pipeline.Pipeline.html)

Scikit-learn pipeline examples from Queirozf -(http://queirozf.com/entries/scikit-learn-pipeline-examples)

Creating Sklearn pipelines in Python (Video)

Creating Pipelines Using Sklearn in Python (Video)

Full-fledged Machine Learning Pipeline Frameworks

Now imagine having to run this Machine Learning task in a full-fledged production environment servicing many stakeholders that needs to do the following:

  1. Have the flexibility to quickly be configured and re-configured
  2. Be able to scale quickly
  3. Retrieve and clean data
  4. Perform feature extraction and selection
  5. Train the Machine Learning model(s)
  6. Test and validate the Machine Learning model(s)
  7. Monitor the running Machine Learning model(s)
  8. Take care of algorithm biases, fairness, and safety
  9. Send alerts if there are any anomalies in the system
  10. Follow security best practices
  11. Be fault-tolerant

The simple scikit-learn pipeline does not have the features to be able to take care of these problems. This is where other DevOps frameworks and pipelines come in which we will discuss next.

Tensorflow Machine Learning Pipeline With TFX

(Ref. – link)

TensorFlow Extended (also known as TFX) is a production-grade pipeline framework created by Google. The way it works is by segregating Machine Learning tasks into different components that run in a sequence. An example of such a component may be a code segment which takes in the input data and splits it into training and test sets, while another example may be a code segment which trains a Logistic Regression model. All of these components run in a Directed Acyclic Graph (DAG) which is a technical way of saying that the components run sequentially without forming any loops (e.g. step B will always follow step A just once).

A typical TFX pipeline consists of the following components shown below.

ExampleGen – reads in the input data and can split it into training and test sets

StatisticsGen – computes statistics about the input dataset

SchemaGen – creates a schema for the input data and infers data types, categories, ranges, and more

ExampleValidator – validates the input data and checks for training/test skews or anomalies in the data

Transform – creates features from the input data

Trainer – trains the model based on the data and features

Evaluator – tests the trained model and performs validation checks as well as an analysis of the model so assess whether it is ready to be deployed in production

Pusher – deploys the trained, tested, and polished model to production

Here’s a simple example illustrating the Directed Acyclic Graph (DAG) of these steps using Apache Airflow.

This image has an empty alt attribute; its file name is screen-shot-2020-05-17-at-12.58.14-pm.png
(Ref. – link)

As you can see, the first step here is the CsvExampleGen, which feeds into the other steps and the steps do not loop around to the top. This way it creates a dependency graph whereby a step such as the Trainer cannot run until the SchemaGen and Transform have completed.

An important bit that needs to be highlighted is that after each component finishes, it stores any output artifacts in a metadata store which then gets picked up as input to the next component. This is how the components can execute sequentially by feeding off of each other. As you may imagine, this complex sequential runtime of a Machine Learning pipeline would need to run under an orchestration service. The orchestration service will take care of hosting the pipeline on various machine nodes or even clusters. They can delegate process memory, disk space, and processing power for various tasks and compute nodes, as well as direct the flow of the pipeline in a simple manner. Examples of such orchestrator tools one could use are Kubeflow or Apache Airflow.

TFX is a vast and complete Machine Learning pipeline service that should really be best covered in a course. This blog post really cannot do it justice besides a very cursory introduction for what it can do.

For more information, the TensorFlow Extended site has some great starting guides, examples, and tutorials to get you started!

Azure Machine Learning Pipelines

(Ref. – link)

In the same vein of Machine Learning pipelines, another powerful offering is the Microsoft Azure Machine Learning pipeline. While this is a deep topic that requires its own post, it consists of the following steps.

First, one must sign up for the Azure service and create an Azure Machine Learning workspace. Then, one needs to set up the Azure ML SDK to enable the ability to configure the pipeline. Afterward, one needs to set up a datastore for storing artifacts from the pipeline in persistent storage, and a PipelineData object to allow for data to easily flow between data steps and enable the pipeline steps to communicate with each other. The final step involves configuring the compute nodes or targets in which the pipeline will run. The rest will just consist of code to create and launch pipeline steps in regards to (data preparation, model training, model storage, model validation, model deployment, and monitoring). Are you seeing some patterns? This is somewhat similar to the TensorFlow extended example.

For specifics, check out the following two articles as they explain this topic in length.

What are ML Azure pipelines – (https://docs.microsoft.com/en-us/azure/machine-learning/concept-ml-pipelines)

Creating ML pipelines with the Azure ML SDK – (https://docs.microsoft.com/en-us/azure/machine-learning/how-to-create-your-first-pipeline)

There are also other notable Machine Learning pipeline frameworks that we should be aware of, highlighted below.

Keras using scikit-learn pipelines – (https://www.kaggle.com/residentmario/using-keras-models-with-scikit-learn-pipelines)

Apache Spark pipelines – (https://spark.apache.org/docs/latest/ml-pipeline.html)

AWS Machine Learning pipelines using Amazon SageMaker and Apache Airflow – (https://aws.amazon.com/blogs/machine-learning/build-end-to-end-machine-learning-workflows-with-amazon-sagemaker-and-apache-airflow/)

d6tflow (can use PyTorch as well) – (https://www.kdnuggets.com/2019/09/5-step-guide-scalable-deep-learning-pipelines-d6tflow.html)

Some general Python pipeline packages – (https://medium.com/@Minyus86/comparison-of-pipeline-workflow-packages-airflow-luigi-gokart-metaflow-kedro-pipelinex-5daf57c17e7)

AutoML – A Simpler Way to Leverage Machine Learning Pipelines

Google Cloud AutoML

In case you haven’t made this observation yet, the notion of creating a Machine Learning pipeline can be incredibly time consuming and complex. AutoML aims to simplify this process by skipping all the intermediary steps such as feature selection and model training/tuning and go from the initial raw data to final predictions about that data. This is great because one can essentially build a Machine Learning pipeline with very little effort and have it compute results in no time. This does come with drawbacks, however. AutoML frameworks typically only emphasize performance as the end goal (i.e. did it classify well or not?), and often, there is more to Machine Learning than performance, such as bias/fairness, as well as space and time complexity. Finally, AutoML can build some very powerful standard models, but if you have a more custom or unique problem that requires combining some esoteric Machine Learning and statistical concepts, or even need to maximize performance and accuracy, you will be better off building the Machine Learning pipeline yourself.

Some leaders in this space are the following

Google Cloud AutoML – (https://cloud.google.com/automl)

Auto Sklearn – (https://automl.github.io/auto-sklearn/master/)

H20 AutoML – (http://docs.h2o.ai/h2o/latest-stable/h2o-docs/automl.html)

Auto Keras – (https://autokeras.com/)

Final Remarks

As we conclude, I want to leave you with a final note. If you want to be proficient in quickly learning and using Machine Learning pipeline tools it may be worthwhile to add Docker to your Machine Learning skillset. Moreover, you should be familiar with Object-Oriented Programming Principles (OOP), and have a good understanding in how you will organize all the different components of your Machine Learning applications (e.g. your input files, trainers, optimizers, validators, hyperparameters, etc.). David Chong wrote a good post to help you learn how to do this.

I hope this post has shed light on a more complex and progressive topic of Machine Learning that we should soon pick up on as responsible Data Scientists and Machine Learning engineers.

Cheers and happy coding!

A Brief Summary of “No Code” and the Main Players in the Space

Author: Mihai Avram | Date: 4/9/2020

As it becomes easier to be a developer, and hardware becomes faster, technology advances and evolves rapidly. This rapid change gave rise to the No Code and Low Code software movements. This is because many developers have started creating tools to make their lives and the lives of other developers easier, and publishing their results in the process. No Code is here to stay as it makes the process of solving problems much faster and cheaper, hence we must at least do our homework and understand it. This short guide will hopefully give us an idea of where to begin to learn about No Code and what the popular platforms and tools are in this space as of now.

What is No Code

A No Code tool is usually a piece of software that can complete a specific task very quickly and efficiently, which can be plugged in, to work with the other software features of your product, project, or business. An important artifact of a No Code tool is that it usually requires very little coding skills to set up. Tools like these can be very powerful because instead of having to spend a lot of time and resources to solve a problem, you can instead use a tool which is very often cheaper, and faster. A good use case for explaining this is the following: Let’s say you are the owner of a factory that produces N95 Surgical Masks to help with the COVID-19 pandemic. You may own a few data sources that store information about areas where they need to be delivered, along with buyer prices for each region. Now let’s say you wanted to know which areas have the highest demand of the N95 masks you produce but also yield a profit margin that allows your business to be sustainable. You could hire a data analyst or create a few complex SQL queries to answer this question. Alternatively, you could use a No Code tool called Obviously AI which you connect to your data sources and simply ask the following question “What regions have the highest demand of N95 masks and are also profitable” – if set up correctly, the Obviously AI tool should be able to generate a response and report back a solution within seconds. Notice how you did not need to spend much time or resources to solve this problem? That is the value proposition of the No Code movement.

What is Low Code

A Low Code tool is very similar to a No Code tool with the only difference being the development aspect. In a Low Code tool, some programming expertise is still expected from the user; however, the coding process is simplified. One could argue that MySQL Workbench is a good example of this because it provides a Graphical User Interface (GUI) that allows one to configure the database more intuitively, rather than having to write everything using the command line as is done traditionally. Even writing queries may be quicker and faster with syntax correction, and other query assist/optimization methods which MySQL Workbench provides.

Popular No Code Tools and Platforms

Let’s now look into some of the most prevalent No Code tools and organizations that are offering such services. This list was curated by searching various No Code aggregation lists and gauging the popularity and usefulness of the platforms from there.

Zapier – The glue of the web

Zapier is considered the glue of the web. The platform provides integrations for different disconnected parts of your workflow to connect, and does this very well. For instance, you could do the following things with Zapier, and this is just the tip of the iceberg as they have a plethora of app and workflow integrations:

  • Sharing blog posts to social media automatically
  • Sync up notes on different note-taking platforms (e.g. Evernote, Trello, Asana, etc.)
  • Turn e-mails into items on your to-do list
  • Get a summary of information for a period of time

Nintex – Task automation for teams and businesses

Nintex is a task automation tool similar to Zapier, however, it is catered more for business workflow automation. You can think of Nintex as the glue of business workflows all using various custom automations built and managed by the Nintex team. Here are some examples of what Nintex can automate which are common business use cases:

  • Client onboarding
  • Proposal management
  • Pitch deck creation
  • Quality assurance
  • Customer service
  • Incident management
  • Account closures
  • And much more…

AppSheet – Create multi-platform apps from Excel Sheets

AppSheet is a platform that allows the creation of functional and powerful apps simply from documents such as Excel or Google Sheets. The apps can include powerful features such as GPS coordinates, offline data access, and conditional logic. Hence, AppSheet is a very powerful way to quickly build fully functional prototypes without the need to write any code.

Appian – Low-code automation software solutions

Similar to AppSheet, Appian automates the creation of apps from logical workflows that can be configured using the Appian software. This means that apps can be built with very little code and mostly just workflows and configurations. What is more, is Appian gives customers the flexibility to host their software anywhere they wish, and also take advantage of their powerful security features and reporting analytics for every app they create.

Salesforce – All in one customer resource management platform

Salesforce is an industry leader in customer resource management (CRM). They do this with specialized software to track and manage sales, marketing, commerce, engagement, productivity, and more. Salesforce has many integrations for improving and managing customer relationships. Here are a few examples:

  • Using AI to predict and forecast sales metrics
  • Deliver customer journeys that are personalized for every individual and can include various digital points such as a user’s e-mail, social network profile, and more
  • Automate a customer’s subscription and billing

Finally, Salesforce even provides custom solutions to various industries such as Financial Services, Healthcare, and Philanthropy.

Retool – Quick internal tool builder

Retool provides an interactive interface where one can create any internal tool with drag and drop features and configurable options. The integrated tools can be as simple as a report retrieved from a database and as complex as an interactive display that can trigger various processes of your project or business. Retool is very powerful because it can integrate with virtually any API or data source, and can display this information in a user-friendly way almost akin to an app or a program. Here are some examples of what Retool can be used for:

  • A report that shows various information from your database in production
  • An administration panel for a Firebase app whereby information can be created, changed or deleted
  • A panel which can display problematic orders, and issue refunds to the customers with Stripe

Webflow – All in one web design platform

Webflow offers a powerful tool where you can create responsive websites using their drag and drop tools and templates. Most website logic and design that can be done using HTML, JavaScript, and CSS can easily be configured using Webflow with little to no coding experience. If you are an experienced coder you can also add custom logic and designs to enhance or override any behavior for your website on top of the provided templates. Webflow also takes care of hosting, backups, and other user-facing website headaches.

Shopify – All inclusive marketplace management solution

Shopify touts itself as the de facto eCommerce platform where anybody with an eCommerce idea could host, manage, and grow their eCommerce operations. Shopify lets you launch a site, manage your inventory and products, take care of pricing and payments, and even ship and market your products. All of this is done through the Shopify platform with friendly guides so that you can get started with little knowledge about running an eCommerce business.

Fiverr – Service for custom solutions built by freelancers

Fiverr is one of many freelancer recruiting platforms that pairs up business owners and funded projects with talented people that can work for such projects. The way it works is it allows a project owner who has a solution they need to solve, to search for that service on Fiverr based on their needs in terms of talent and pricing. The project owner can then select a freelancer whose criteria matches what the project owner wants, they get matched up, and the freelancer helps the project owner with that problem. Fiverr offers services in regards to programming, graphic design, copywriting, translating, film editing, and much more. Almost any problem can be solved with this platform given that you have the budget to pay for a freelancer to help you. What is more, is that Fiverr is just one of such project/freelancer matching platforms, there are many more – with some other notable ones being Upwork, Freelancer.com, or Toptal. Here’s a portal to some notable freelancer platforms compiled by the team at G2.

Bubble – Build full-fledged applications with very little code

Bubble offers a powerful feature-set that allows anybody to prototype, build, iterate, host, and launch an app with little to no coding experience. Bubble gives the users full control of the design and logic of their app. This is achieved through drag-and-drop designing on the Bubble interface as well as configurable logic such as showing a text field when a button is clicked.

Here are some examples of apps you can build with bubble:

  • A social network site that allows users to share photos and videos
  • A marketplace website
  • An administration panel for patients of a health organization

Obviously AI – Get the benefits of data science and analytics without having to write code

Obviously AI makes it very simple to solve analytics and AI problems by using columnar data or spreadsheets (e.g. Google Sheets, Airtable, or Excel). The way it works is by having all your data that you are tracking in a traditional row/column format, link the data with Obviously AI, then ask Obviously AI a question. The service will then load, clean, and analyze your data to predict and answer your question, all automatically using AI. Here are some examples of questions that Obviously AI can answer, provided you have the related data.

  • Which customers are likely to buy again?
  • What is the age and education level of a customer paying more than $1,000
  • How many cases of the coronavirus (COVID-19) will there be in Idaho in a few months?

WordPress – All in one solution for creating and managing any type of website

WordPress is a website builder that claims to power about 36% of the web. What this means is about one in three websites use WordPress in one way or another. Similar to Shopify, WordPress allows a user to create their website by simply selecting or buying customizable website templates. Moreover, there are hundreds of useful plugins that can track the traffic on your site, allow users to contact you, mitigate security issues, and much more. WordPress can host your service on their servers and even allows you to create any website, blog, eCommerce site, eLearning site, and much more, all with little to no coding.

No Code Aggregators and Communities

The following sites offer No Code exploration services, summaries of new No Code tools, courses, lessons, email lists, and much more if you want to learn more about No Code.

Makerpad – The most popular no code service aggregator

Makerpad is a leader in providing No Code solutions to individuals and businesses. They have a community of over 10,000 people, hundreds of lessons about how to use various No Code technologies, as well as a support program to help anybody who would like to build a custom solution for a problem they may have using No Code. Makerpad also serves as a No Code exploration tool whereby a user can search and filter for any type of No Code tools based on what their needs are and can get a lot of credits for using those tools if they subscribe to the Makerpad membership.

NoCode – The best free no code exploration service

NoCode is a great place to explore different No Code tools depending on whatever problem you may want to solve. This platform can also give discounts and credits for No Code tools and can keep you up to date on the latest tools and trends with minimal effort. The greatest advantage of this platform is that it is absolutely free to join, and can be a very affordable way to get integrated with the No Code community and infrastructure.

Zeroqode – The most powerful site template provider

Zeroqode provides templates for powerful dynamic sites for specialized use cases. This includes, for instance, sites that have optimized upvote/downvote systems, recommendation sites like Airbnb, business-ready sites with beautiful fully loaded admin panels, payment integrations with stripe, and more. Albeit expensive with a lot of fully working sites and solutions costing around $100, there are over 100 different customized already-working sites for different purposes, which can solve most solutions that businesses are looking for. Most of these sites are written using Bubble.io which is a very powerful visual website builder. Zeroqode also allows users who purchase their templates to edit them to their choosing and take courses about how to build and customize such custom sites. Finally, Zeroqode also provides a support team that can help with creating, tweaking, and customizing such sites and templates. All in all, Zeroqode is a great tool for powerful and cheap one-size-fits-all solutions.

Well there you have it, now you have most of the insights to be fairly enlightened about this growing movement. If you want more information, you can check out these websites which compile a sizable amount of No Code platforms so you can keep exploring!

G2 No Code Platforms – (link)

Gartner Report Low Code Application Platforms – (link)

Tools and Techniques to Help You Code and Work Faster

Author: Mihai Avram | Date: 2/16/2020

A unique quality that I believe to be ingrained in most programmers and IT specialists is their unrelenting desire to get better. Get better at understanding code, or sorting that list of ice cream cone emojis faster.

[🍦, 🍧, 🍨] – Just yum!

Or perhaps learning a new language, picking up that brand new testing framework, and working faster! This article is for those coders, the ones that want to level on their up their speed when it comes coding and working in general! Here we go….

Shortcuts, shortcuts, shortcuts

You may know the basic shortcuts to make your life easier such as copy/paste since about the 5th grade. However, imagine if any repeated action you made on your machine while coding could be automated with a shortcut. Likely your productivity would increase a large amount. This is because your interactions with your best friend (your workstation) will take less time and your attention will not be fragmented by the time it takes. For instance, more complex shortcuts would be navigating to and from and to different software that you have running. Or going to the beginning of the line you are coding very quickly to change something instead of clicking there or trudging there character by character. While this topic is deep and we can only scratch the surface, the best tip is to check the documentation or google shortcuts for whatever software or operating systems you work often with, and try to find and remember the shortcuts for the things you do most!

Here are two great articles to get you started with this:

General Usage and Windows Usage – (39 No Frills Keyboard Shortcuts every Developer Should Know About)

Mac Usage – (12 Keyboard shortcuts every programmer should know)

Code Scaffolding Tools

This particular tip matters more if you have to start a lot of projects or microservices from scratch. The way scaffolding tools
work is that they usually have a minimally configured codebase that has all top-level features organized and the main files and configurables put together in one place for you to focus more on building the
features you care about instead of getting your code started and running. One popular example of this is the npm create-react-app my-app from the React community which creates a starting and simple React app. A lot of other coding frameworks have such features in place such as the Vue CLI, the Ruby on Rails generate command, and the Django startproject examples. You can simply google something like “<Your-Framework> code scaffolding tools and examples” and you should stumble across quite a few.

Some progressive projects behind this are Yeoman, Slush, and the Hackathon-Quickstart GitHub repository which all have a lot of different frameworks and languages to choose from.

Terminal and Preferably the Oh My Zsh Terminal Configuration

First of all, it goes without saying that if you are not using a terminal, then you should start to learn to do this first. While at first glance, it may be quicker to launch software by clicking instead of typing a command, the moment you need to configure, navigate or interact with the software, the navigation costs will start to feel like borrowed time. Put in context, the time it takes to configure a more complex set-up of a software and then run it may be long. In contrast, this could essentially be done with one command in the terminal. Sure, maybe this command may take some time to build up at first, but afterward, you can simply run it by pasting it in the terminal which happens instantaneously. Learn to use terminals, it will help you save a lot of time! Now that we got that over with, let’s talk about Oh My Zsh. This software is an open-source framework for managing Zsh (which is a terminal configuration). By using Oh My Zsh and its numerous plugins and themes, you can essentially decorate your terminal and commands to do the things you are always looking for and doing – all very quickly. Here are some examples of this:

  • Leveraging the alias gcm to run git checkout master in your terminal.
  • Hitting ESC twice to prefix any previously-run command with sudo.
  • Adding syntax highlighting so you have better cues on which commands you run in the terminal are valid.

And this is just the tip of the iceberg, for a more in-depth look at Oh My Zsh, check out this great video (Learn Zsh in 80 Minutes – Oh My Zsh – Command Line Power User)

A Good IDE For Your Needs

While most developers already use an Integrated Development Environment (IDE), it is essential to ask what one is using it for. Besides a single place that holds all of our code, IDEs can be very powerful by offering debuggers, compilers, terminal support, IntelliSense, automation tools, and much more. You should first start by asking yourself what features you really need, what programming language you use, and if you value the speed or quickness of the IDE. Generally speaking Vim and Sublime text are amongst the quickest. Alternatively, if you only code in Python, PyCharm is one of the best IDEs for the language. Otherwise, it is worth looking into some of the heavyweight and more powerful IDEs such as Visual Studio and Atom, look at all their features, and use the ones that have the features you want.

Here are some links to get you thinking about which IDEs may be best for you:

High-level overview from Wikipedia – (Comparison of integrated development environments)

Conversation on Quora – (What is the best IDE?)

One of many IDE comparison articles – (What are the best IDEs?)

Finding Tools and Chops

Sometimes our time spent is spent on coding, but sometimes it is spent on searching. Why not make searching faster instead of going to your Finder or File Explorer and searching using the GUI. The Silver Searcher is one of the best tools for this, as it can search for words in files, or files in folders and any combination in between. What is more, is that The Silver Searcher claims to be much faster than ‘ack’ which is another command-line tool to search for words and files. So get to know The Silver Searcher, the ‘ack’, ‘grep’ and ‘find’ commands so you can search for things very quickly the next time you need to do so.

Note that most of these tools work very well with the Mac and Linux operating systems, and some can even be configured in Windows, just google “Installing ack in Windows” for example.

Here are some good use cases of this:

  1. find /project -name config.json to find if there is a config.json file under the project directory and also show where it is located.
  2. grep -i -r "bug" . to find all instances of the word bug (case insensitive) recursively in your current directory files.
  3. ack bug to find instances of the word “bug” in all of the files in the current directory, and all children elements (recursively).
  4. ag 127.0.0.1 to use The Silver Searcher and find all instances of localhost in all the files in the current directory (recursively). This is the fastest tool and command of all of the ones mentioned here.

For more information, check out the following links:

Find – (Linux/Mac Terminal Tutorial: How To Use The find Command)

Grep – (Linux/Mac Terminal Tutorial: The Grep Command – Search Files and Directories for Patterns of Text)

Ack – (Top 10 reasons to use ack for source code)

The Silver Searcher – (Documentation and Code on GitHub)

Quick Navigation

Once you learn how to quickly navigate software in your operating system you will start to get things done quickly and even allow yourself to consume more information quicker since you will be context switching much faster, if at all.

Get to know how to quickly navigate between the software on your machine and operating system with the following commands.

Windows: Alt + Tab
Mac: Command + Tab
Linux: (Super or Alt) + Tab

Get to know how to snap windows in different places of the screen so that you can cross-reference your work (e.g. reading about something on Stack Overflow while also coding in your chosen IDE the from above :p).

Windows: Windows Key + Arrow Keys
Mac: Check out Magnet or some of the free alternative software out there
Linux: Super + Arrow Keys

Memorize these commands if you haven’t and make constant use of them. You will start to see your productivity soar!

Other Miscellaneous Tips

Some other important ways to improve your working and coding speed that come to mind are:

  • Using version control (e.g. Git, Mercurial)
  • A desktop/laptop which is powerful enough to handle all your work quickly (in milliseconds not seconds)
  • Automation-first thinking
  • Two regular monitors/screens or one large monitor

That’s all for now. I hope this all helps and happy coding!